Selling Images? Print Them Yourself For Best Results!
By Kaitlin Walsh–
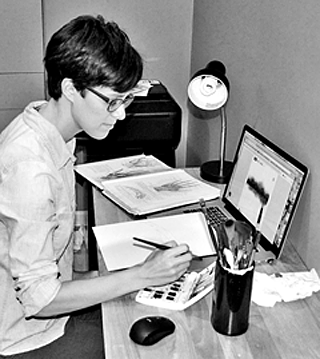
The artist (and author of this article) in her studio.
A couple of years ago I decided that outsourcing my printing didn’t give me the artistic control I needed to make sure my customers were getting the best possible prints and service that I could give them. My hunger for more autonomy prompted me to set up a home printing operation and that, of course, involved making some hard choices.
After weeks of research and budgeting, I took the plunge and invested in an Epson SureColor P800 fine art printer in order to create an at-home Lyon Road print shop. I’ve now been printing and shipping from my basement for almost two years and the results have been even better than I hoped for.
First off, it’s better for my customers. Here’s what an at-home print shop can do for you:
Quality control – I am able to triple-check each print before I send it off, making sure that there are no mistakes, no marks or misalignment, that the color is spot-on and that the paper is crisp and smooth.
Signature – I am now able to hand-sign every print I send off!
Speed – My processing time has been shortened to 1-2 days, compared to my original 3-5 days. Great for last-minute orders.
Packaging – My packaging system greatly decreases the risk of shipping damage. I can also make the packaging pretty as can be.
Based on my experiences, I’d like to share a few things I’ve learned that may smooth the way for you if you decide to set up your own print shop.
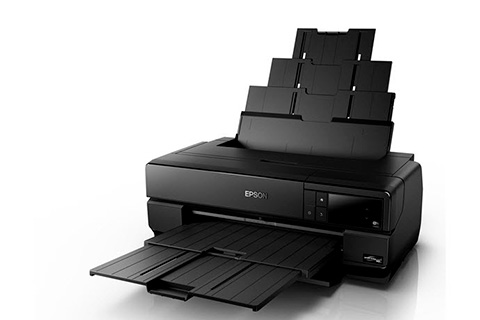
A professional quality printer will give you great results. The Epson SureColor P800 is a champ.
Inventory: After your initial purchases of materials, you’ll have to keep an ongoing inventory. Mine’s not very high-tech, I’ll admit. If I notice a material is getting low, I’ll write it on my white board. When I get the time (between parenting, printing and painting), I’ll quick buy online anything that’s on the white board. The other thing I do is keep an excel spreadsheet that lists each item in my inventory, the price, where I purchase it, and any special notes (i.e. free shipping on orders over $50). This means I never have to remember where I get things. And… it’s great because if I happen to find a similar item somewhere else, I can quickly compare prices to see if I want to change suppliers.
Cutting: Although Red River Paper supplies paper in a wide variety of sizes, I sometimes need to trim my paper or a mat to the correct size and I cannot sing enough praises for my Rotatrim which was an excellent investment and does every job accurately in just a few seconds.
Printing: Always use a wired connection between your printer and computer. Don’t even bother to do a wireless set up. I tried but found it inefficient, frustrating and not worth it. Even the Epson tech I called advised against it. Just go old school and use a cable.
Packaging: Once the print is done, I sign it and put it in a clear bag, as quickly as possible, so that nothing can damage it. I then tape the bag to the cardboard protector, tape on my note and my business card, and put it in its mailer. Easy-peasy. If it’s a larger size, I put the clear bag in a shipping box, wrap it in bubble wrap and fill the box with filler paper.
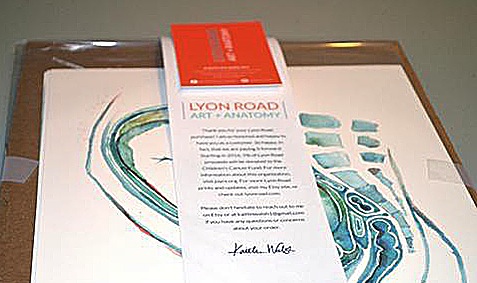
Wrapping carefully prevents damage…and returns.
Labeling: There are online services where you can prepay postage and then print your own shipping labels. If you use Paypal, you’ll get a commercial rate which is less than what you’d pay at the P.O. and also have a full range of shipping options like proof of delivery, insurance and so on. When you’ve finished inputting your information, print the label, tape it to your package and leave it out for free pick-up by your mail carrier. Or you can drop it in a mailbox or at the P.O. if you prefer.
Other Tips
Stay organized: I rearranged my work space several times before I had it organized in a way that made physical and mental sense. All my shipping materials are on one side of the room, sorted by size. All my paper and printing materials are on the other side, also sorted by size. Do you ever drive to a place that you’ve been a thousand times, and realize you don’t even remember driving there? That’s how I feel about printing now that things are set up systematically. I don’t even have to think about what I’m doing, because everything is where it should be. It has become pleasantly rote. Plus, I can easily see if inventory is low, at a glance.
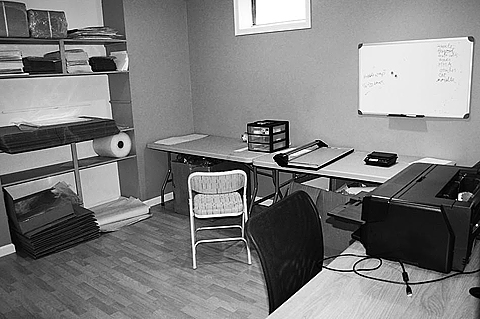
A place for everything and everything in its place makes it easy-peasy.
Stay clean: Benefits are obvious. Things get lost in a messy room. Prints seem more likely to get bent or dirty. It takes longer to do work. And most of all, clean rooms are a joy to work in. Messy ones are not. I’ll admit, if my workroom is getting tornado-y, I’ll clean that and just ignore the rest of my house. Busy girl’s gotta do what a busy girl has to do.
The One-Person Assembly Line: I have found that the most efficient way to get a lot of prints done is through a one-person assembly line. What I mean by this is that as I’m printing one order, I’m packaging up and shipping another. This way I’m constantly working (and not wasting time), and it’s less likely I’ll mess up orders. I used to get all my printing done for the day, lay them out in a line, and then package them all. It could get confusing this way and I actually sent out the wrong prints once. Never again!
Stay organized with files too! I realized this months after I started printing, and man, has it made life easier. I finally rearranged all of my files into folders divided by subject matter. I then also made and saved a different file for each size, so that I didn’t have to continuously adjust the size for each print. Huge time-saver! The only downside is it takes up a lot of disc space on my computer. Now I save things on an external hard drive, and I’m also in the process of moving things over to cloud storage.
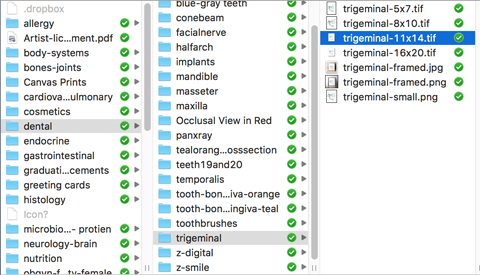
Organizing files so different print sizes are easily at hand saves a huge amount of time.
While printing from home is much more labor-intensive, I find the process surprisingly enjoyable. After the chaos of kids, activities, housework and creating my watercolors, printing has often become a refuge at the end of the day. I guess it’s about the same as what appealed to photographers when they shut the door to their darkrooms and entered another world.
The process is rhythmic and cathartic and allows me to escape a bit. (Who needs yoga when there are SureColor printers available?) All in all, I count myself extremely lucky that my investment has paid off in so many tangible and intangible ways. And it can for you, too.
About the Author
Kaitlin Walsh is a Red River Pro.
RESOURCES
Red River Papers are used exclusively by Kaitlin Walsh for archival prints of her watercolor paintings.
Epson SureColor P800 Printers
Rotatrim paper/mat cutters
To subscribe to Red River Paper’s newsletter
Original Publication Date: June 03, 2018
Article Last updated: February 10, 2025
Related Posts and Information
Categories
About Photographers
Announcements
Back to Basics
Books and Videos
Cards and Calendars
Commentary
Contests
Displaying Images
Editing for Print
Events
Favorite Photo Locations
Featured Software
Free Stuff
Handy Hardware
How-To-Do-It
Imaging
Inks and Papers
Marketing Images
Monitors
Odds and Ends
Photo Gear and Services
Photo History
Photography
Printer Reviews
Printing
Printing Project Ideas
Red River Paper
Red River Paper Pro
RRP Products
Scanners and Scanning
Success on Paper
Techniques
Techniques
Tips and Tricks
Webinars
Words from the Web
Workshops and Exhibits
all
Archives
January, 2025
December, 2024
November, 2024
October, 2024
September, 2024
August, 2024
July, 2024
June, 2024
May, 2024
more archive dates
archive article list


