A guide to using ICC color printer profiles in Photoshop Elements 8 for Mac
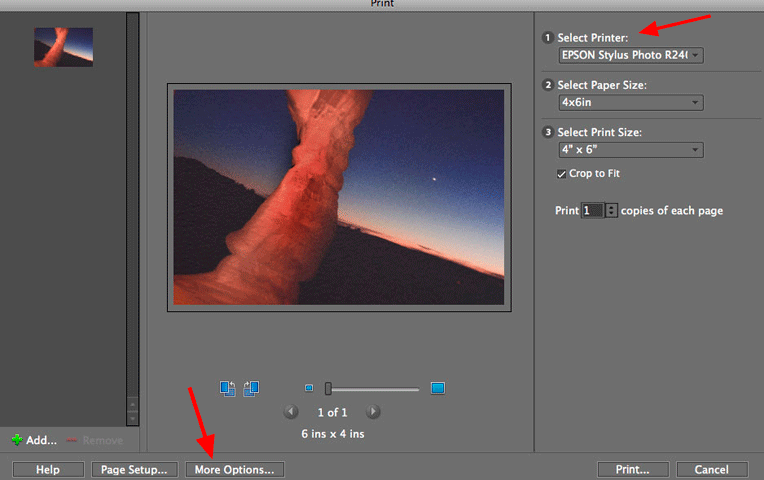
To begin the print process, go to the File menu and select PRINT. This dialog will appear.

1) Select your printer from the drop down menu
2) Click the MORE OPTIONS button at the bottom left
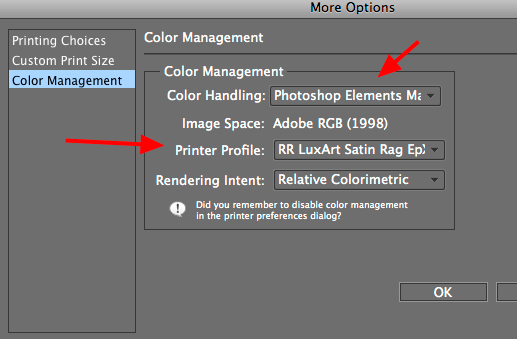
This dialog will appear

1) Choose Photoshop Elements Manages Color
2) Select the ICC profile from the drop down menu - The profile should have the name of your paper and printer
3) Rendering Intent - Either Relative Colorimetric or Perceptual
4) Click OK

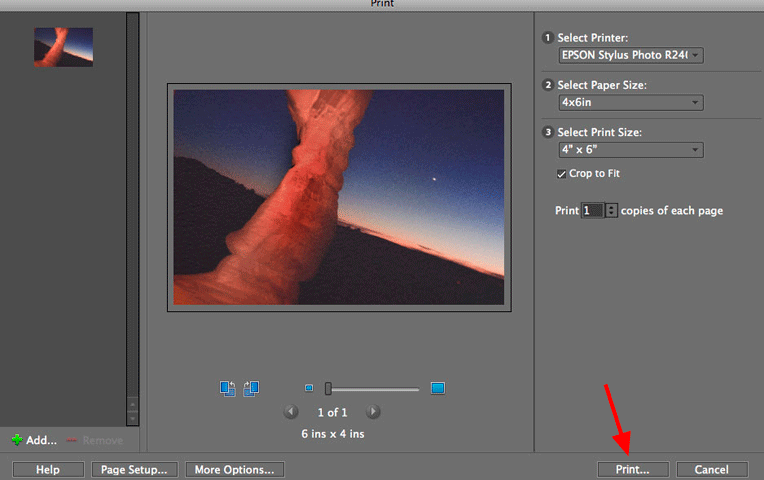
Back at the Print dialog you can now click the Print button to proceed
PRINTING WITH EPSON / CANON / HP
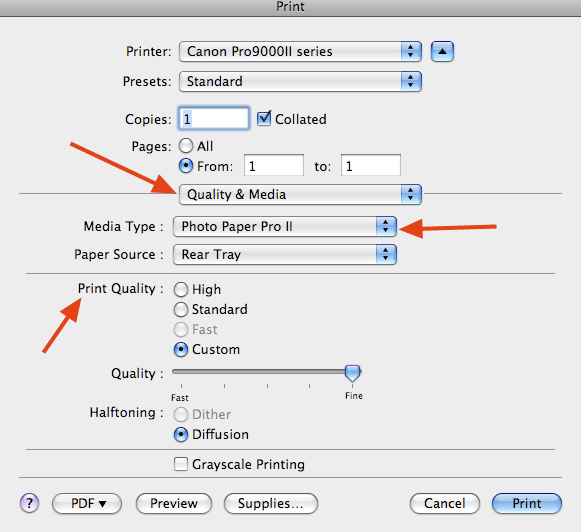
Photoshop Elements 8 will automatically turn off your printer's color management.
What's left is to:
1) Choose the Media Type recommended by the profile's instructions
2) Set quality to level recommended by profile's instructions
Once you verify the settings you can click PRINT

Related Posts and Information
Last updated: September 09, 2019


