Print Studio Pro is plug-in software for Photoshop and Lightroom provided by Canon. It is primarily for quick print jobs and has limited layout ability. In addition, there are controls for three types of color management as well as color correction. This article focuses on how to use Red River Paper's ICC printer color profiles with Print Studio Pro.
These instructions are valid for Windows and Mac. The screen shots are Windows.
Start Print Studio Pro
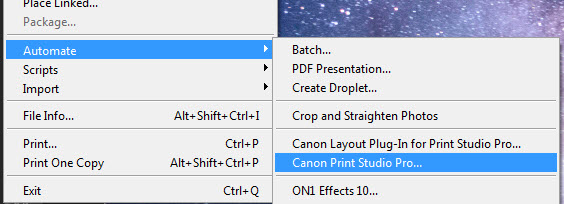
From Photoshop - Click the File > Automate > Canon Print Studio Pro...
From Lightroom
Click the File > Plug-in Extras > Canon Print Studio Pro...

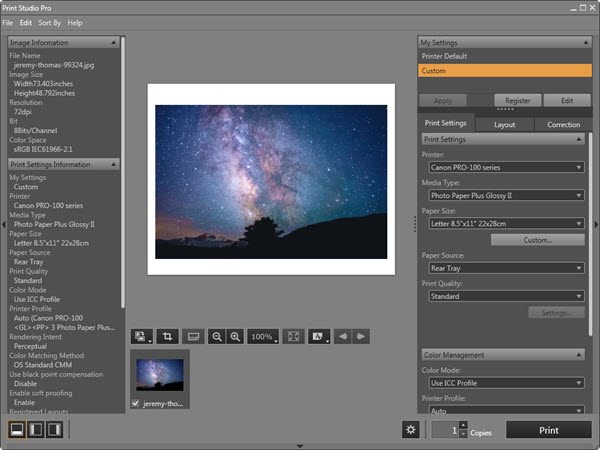
When Print Studio Pro starts, you will see your active image in the middle preview pane:
Print Settings Tab
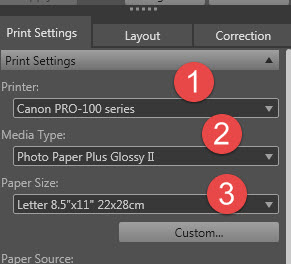
1 - Choose your printer from this drop down menu
2 - Set the media type, which you will find on the profile instructions use PDF that comes with each profile download.
The Red River Paper product you are using will not appear in this dialog.
3 - Set your paper size
Continuing down the Print Settings dialog:
Paper Source - Choose the Rear or Manual feed
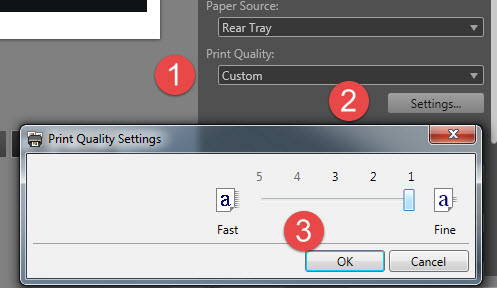
We recommend setting quality to the highest level for most print jobs. To do that:
1 - Select Custom in the Print Quality drop down menu
2 - Click the Settings button
3 - Set quality to level 1 and click OK.
Color management settings:
1 - Set the Color Mode to Use ICC Profile
2 - Choose the profile for your paper and printer. This drop down menu will show you all profiles installed on your computer. You will likely need to scroll up or down to find your profile. They are usually arranged in alphabetical order.
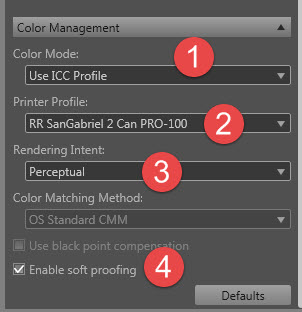
3 - Choose a rendering intent. Most customers use Relative Colorimetric with success. We strongly encourage you to experiment to see which you like best. Learn About Rendering Intents.
4 - Enable soft proofing attempts to show you the affect of a color profile. In this case, it will give you a general idea of how your paper will affect the print. Using this feature will not alter actual print quality.
Go back and verify all of your settings. When you're satisfied with their accuracy, click the PRINT button at bottom right.
Questions?
Contact us via the Support Center
Related Posts and Information
Last updated: May 08, 2023


