How to Install and Use Canon AM1 Config Files
Part 2 - Using the AM1 custom media type
Canon Prograf series printers allow for the addition of "custom media types" into the printer's firmware and driver. This is accomplished via the Canon Media Configuration Tool, software that ships with all Prograf models. Using a custom media type offers users several advantages over selecting a generic media type. It allows the following information to be built into the media type file:
- Ink density limits, paper feed vaccum strength, and print head height / platen gap
- Roll paper settings - automatic cutting, drying time and borderless printing rules
- Paper feed adjustment which is particularily useful with super-heavy media such as canvas
You just downloaded and installed the profile and AM1 file in the first part of this tutorial.
Now, here is how you use the custom media type at the printer and in the print driver dialog.
Load the Paper
When loading sheets or rolls, you will be presented with options on the printer's control panel.
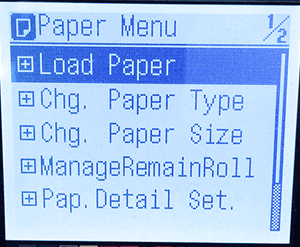
Press the OK button to open this dialog.
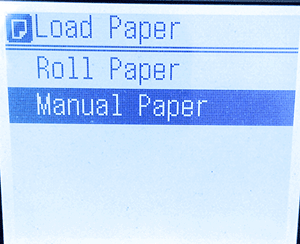
Choose roll or manual and press the OK button.
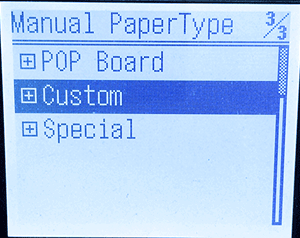
In the Manual Paper Type dialog, scroll down to the Custom category and press the OK button.
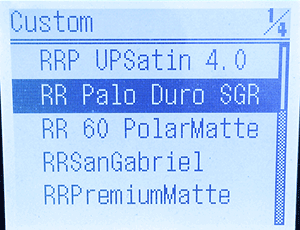
The custom media configurations you have imported via the Media Configuration Tool are listed here. For Red River Paper products, all custom media types start with "RR".
Press OK on the control panel. This selects the custom media type for your next print job.
Complete any other settings on the printer control panel and return to your computer.
NEXT
Start a print job from your photo editing software.
You will set the software a managing color output and choose a printer color profile. If you are not familiar with this process stop now. Go to the profile library and review the "How to Use Profiles" tutorials.
Once you choose a profile, the next step takes you to the Printer Preferences (Windows) or Print (Mac) dialog.
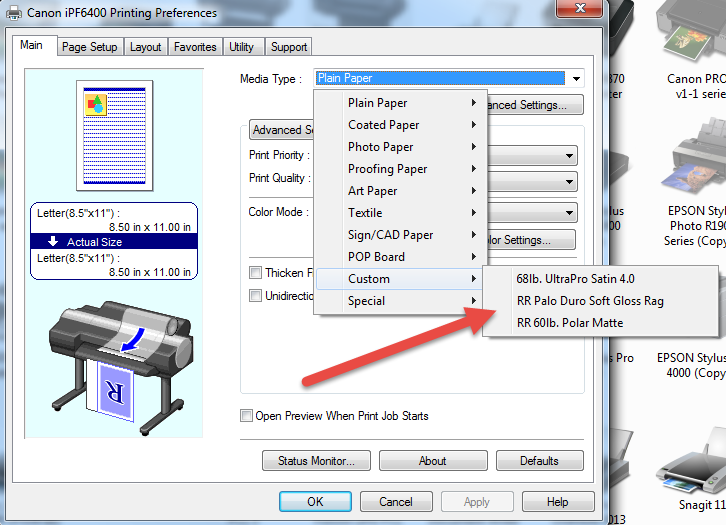
(The dialog on a Mac will look slightly different, but will still contain the custom media choices)
When choosing the Media Type, you will see a Custom subsection. Inside are the names of the custom media types you installed via the Media Configuration Tool.
Choose the media type to match your paper (and the setting you chose on your printer's control panel).
Compete your other settings - quality, size, color matching - and begin the print job.
Related Posts and Information
Last updated: August 22, 2019


