How to create user defined paper sizes - HP and Photoshop Elements
For Red River Paper greeting cards, scrapbook 12x12 sheets, panorama printing, and other special projects, you need to define a custom paper size in the HP printer properties. Below are instructions for setting a custom paper size starting in Photoshop Elements.
Shop for the Best Compatible HP Photo Papers.
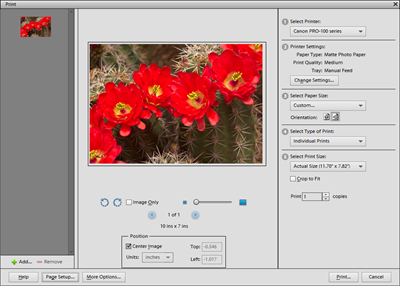
In Photoshop Elements choose File > Print. The Print dialog will appear. Choose your printer from the Printer drop down menu.
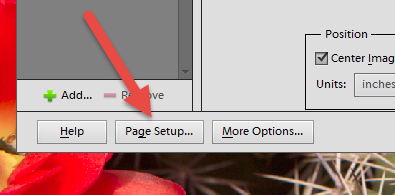
Locate and click Page Setup on the lower left of the Print dialog. This will launch your printer's property dialog.
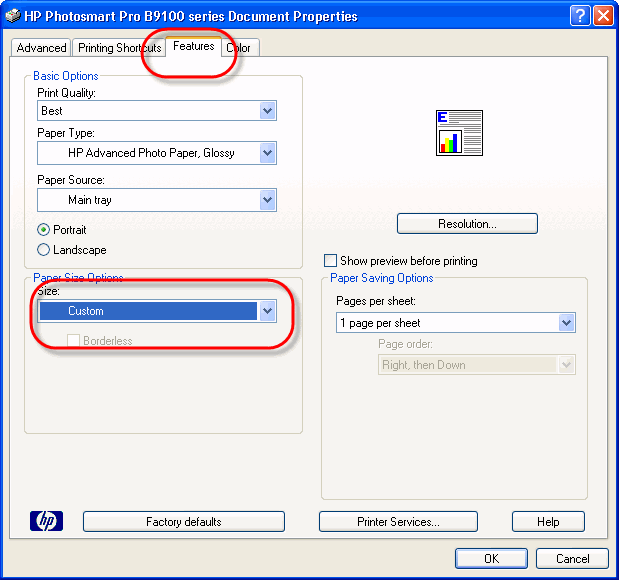
In the printer properties, click on the Features tab.
Under the Paper Size Options, choose Custom.
If you do not see a Custom option in the Size drop down menu, your printer's driver does not support custom sizes. For some reason as yet unknown, HP removed this feature from many printers starting in 2013. Read a Potential Fix to Correct Custom Size Issue.
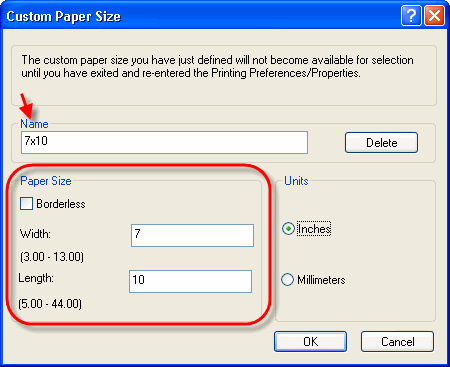
Set the width and height of your custom paper size.
ALWAYS set the smaller sheet dimension to width and larger to height.
Name the size and click OK. It will be available in the Paper Size listing above for future print jobs.
The custom size will now be available for your use in the paper size drop down menu.
FINALLY
Set the media type, quality, and color controls in the printer driver and click OK to go back to the Photoshop print dialog and preview.
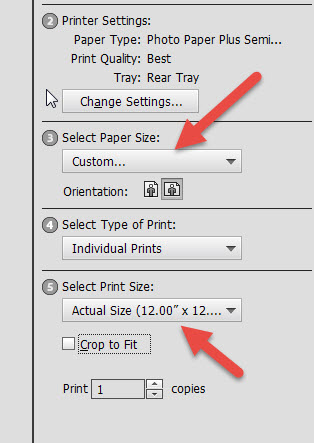
Triple check that Select Paper Size is set to "Custom..." and Select Print Size is set to "Actual Size...", where the actual size is the custom size you just defined.
Once you verify the above you can proceed and make a print.
Last updated: April 25, 2022


