For Red River Paper greeting cards, scrapbook 12x12 sheets, panorama printing, and other special projects, you need to define a custom paper size in the Page Setup dialog.
TO BEGIN
Go File > Print in Photoshop Elements.
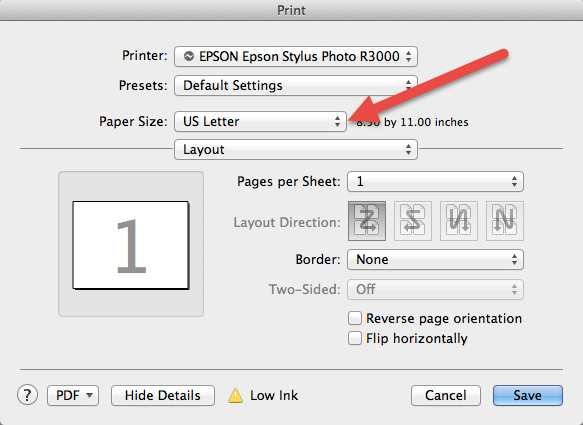
Choose your printer from the Printer drop down menu
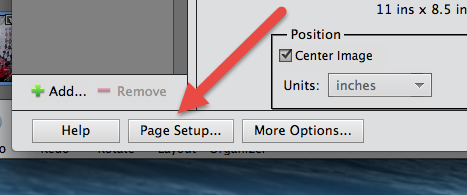
Locate and click the Page Setup button on the lower left of the Print dialog.

PRINT DIALOG
Click the Paper Size drop down menu.

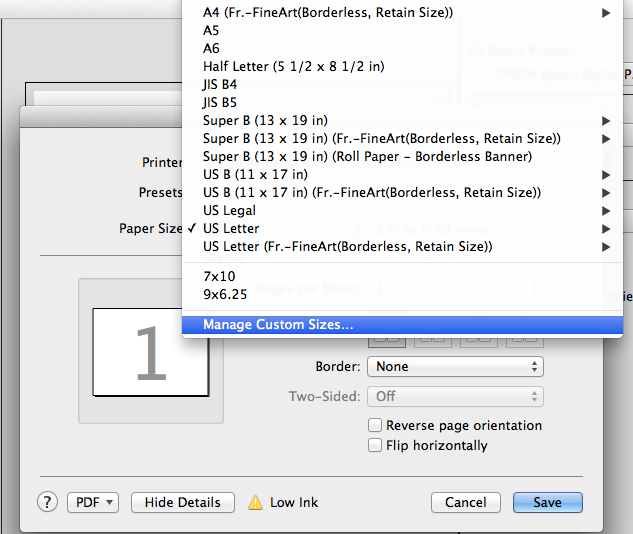
Under "Paper Size" choose "Manage Custom Sizes".

Custom Paper Sizes
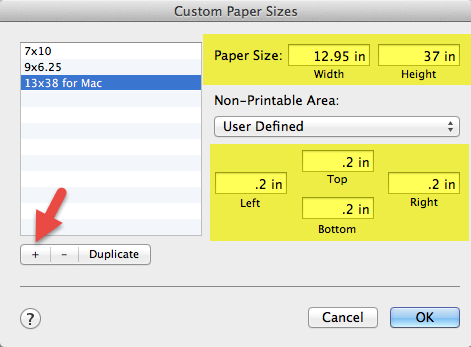
Click the + button to start a new size. It will appear as "Untitled". Double click on it to rename your new size.
Set the width and height.
Width = the smaller dimension of your paper
Height = the longer dimension of your paper
Set Printer Margins. The smallest you can use is 0.15". We recommend 0.2" on all four sides. Setting the number lower will likely result in printing errors or partially printed images.

SPECIAL OSX ERROR FIXES
Apple OSX 10.6 and up has issues with handling custom sizes correctly. If your printer prints only a portion of the image, the image but in a smaller form, or will not print at all, you likely are seeing a custom paper size error.
For 13x38
Set paper width to 12.95"
Set paper height to 37"
This avoids problems with the 3800/3880 max print length of 37.5". You'll still have room for a full 12x36 or 5.5x36 print.
Margins
Margins must be set to 0.2" or larger. Smaller numbers may result in OSX designating your size as a roll and the printer will not print.
Last updated: November 18, 2024


