How to create user-defined paper sizes - Epson | Photoshop | Windows
For Red River Paper greeting cards, scrapbook 12x12 sheets, panorama printing, and other special projects, you need to define a custom paper size in the Epson printer properties. Below are instructions for setting a custom paper size in Photoshop.
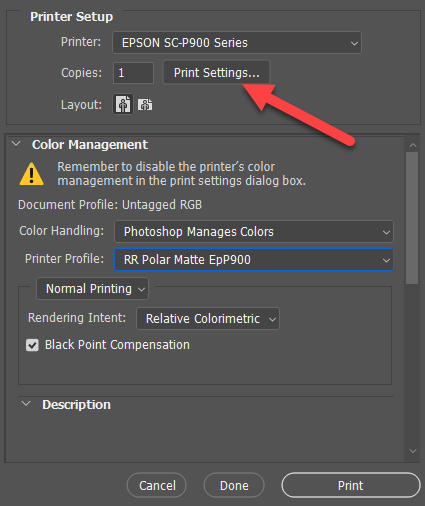
In Photoshop, click PRINT. Choose your printer from the Printer drop-down menu.
Now click the Print Settings button. This will launch your printer's property dialog.

Epson Printer Driver Version #1
On the Main tab of the printer's properties, locate and click the "User Defined..." button.

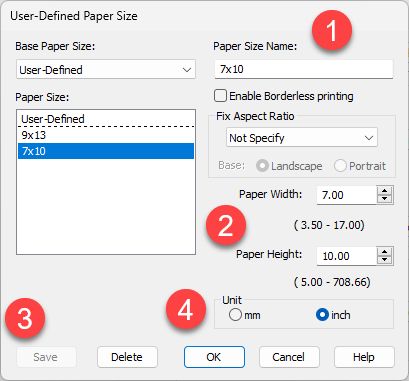
This brings up the User Defined Paper Size dialog.

1 - Name your new paper size something easy to understand. Enter it in the dialog at the top of the menu.
2 - Enter the paper's width and height.
Example - on a 7x10 greeting card width is 7 and height is 10 regardless of the print orientation.
3 - Click Save to save the paper size definition. It will appear on the left side in the Paper Size section.
4 - Click OK when complete.
The custom size will now be available for your use in the paper size drop down menu.
Epson Printer Driver Version #2
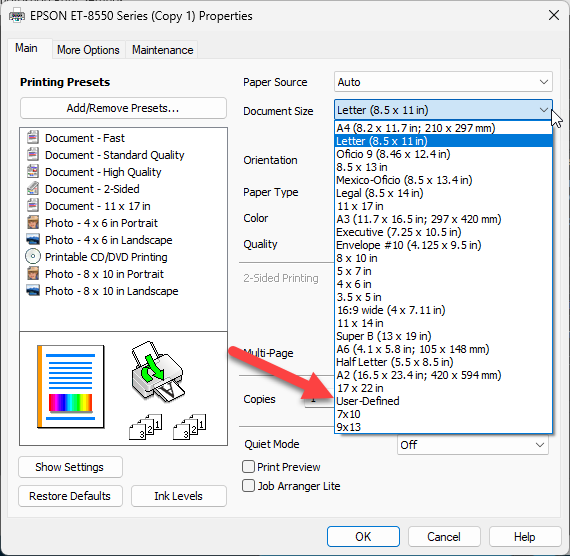
From the Document Size drop-down menu, choose USER-DEFINED.


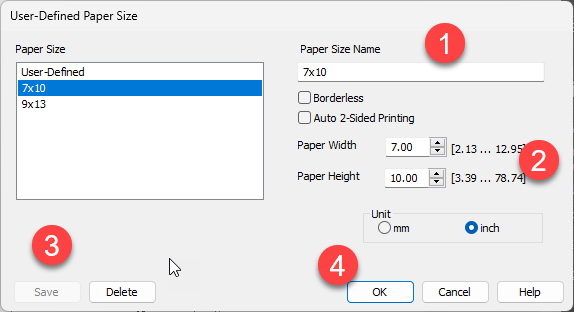
1 - Name your new paper size something easy to understand. Enter it in the dialog at the top of the menu.
2 - Enter the paper's width and height.
Example - on a 7x10 greeting card width is 7 and height is 10 regardless of the print orientation.
3 - Click Save to save the paper size definition. It will appear on the left side in the Paper Size section.
4 - Click OK when complete.
The custom size will now be available for your use in the paper size drop down menu.
Note for 13x38 panorama users - the max paper width will be set to 1295.
Last updated: February 06, 2024


