
As a rule, Canon printers do not allow for custom borderless printing. If you have Photoshop or Photoshop Elements, some sizes can be hacked so you can achieve a borderless print. In this article we'll show you how to print 8x12 and 12x18 sheets without borders on a PRO-1000.
Step 1
Go to your printer's control panel:
Go to Various Settings > Device Settings > Paper Related Settings > Det. Paper Setting Mismatch
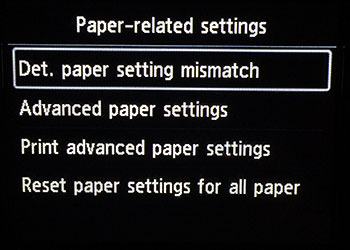
Disable that function by choosing "No".
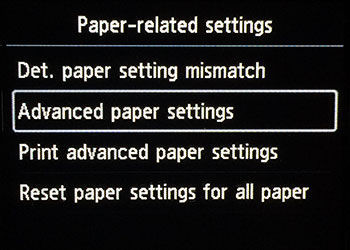
When that is complete, you will be back at the Paper Related Settings submenu. Choose "Advanced Paper Settings"
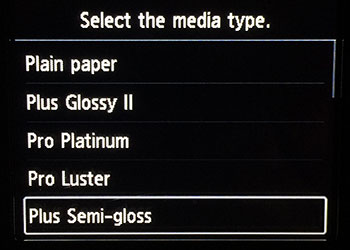
From that menu, choose the media type you will select in the printer driver when printing with the 8x12 and 12x18 paper. In this example, we select Plus Semi-gloss and press OK.
In the menu for Plus Semi-gloss, scroll down and select "Detect paper width".
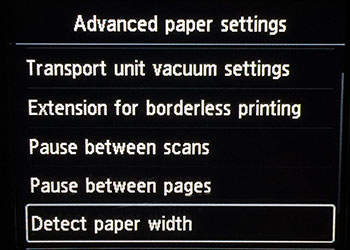
Turn that function OFF.
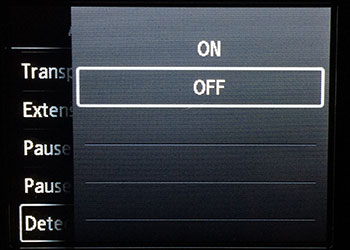
What that is done go back to the home menu.
STEP 2 - MAC
Go to System Preferences > Printers and Scanners > Canon PRO-1000 > Options and Supplies > Utility Tab
Open the Printer Utility
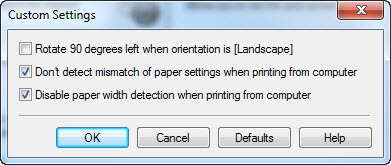
In the Custom Settings Tab check both boxes, "Don't detect mismatch..." and "Disable paper width detection..."
Click Apply
STEP 2 - WINDOWS
Go the your printer's preferences dialog.
Control Panel > Devices and Printers > Canon PRO-1000 or Photoshop print dialog then click Printer Settings.
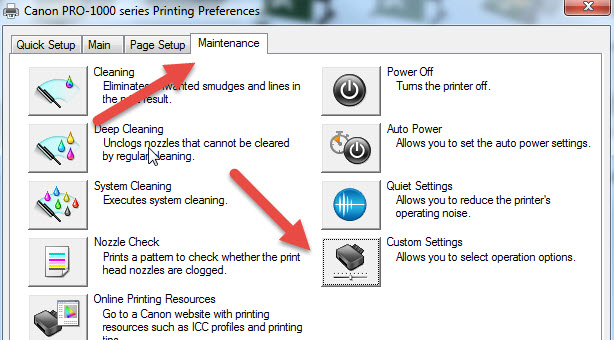
Go to the Maintenance Tab and click Custom Settings.
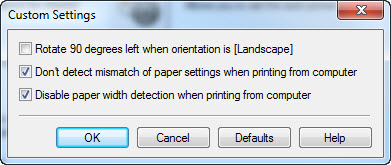
Check the two settings as shown above then click OK.
Next, go to the Page Setup tab and click Print Options.
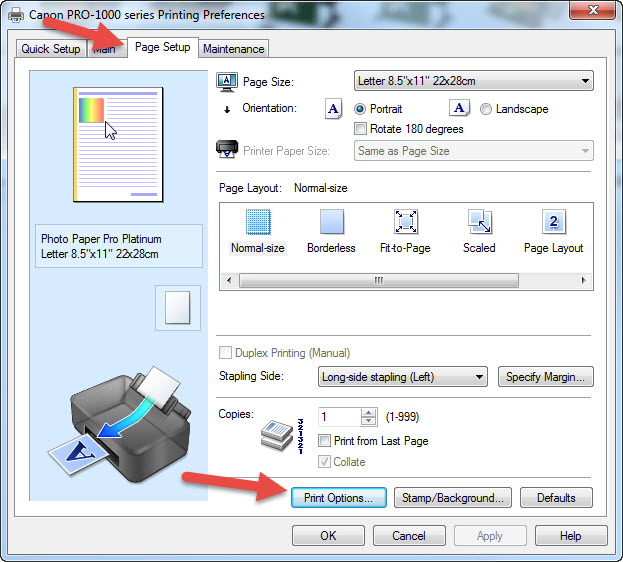
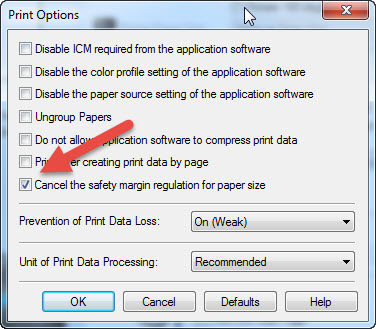
Check the "Cancel the safety margin..." option and click OK.
STEP 3
The next steps assume you have an image prepped and ready to print.

Make a new (blank) file the same resolution as your image.
8" x 12" image - make 10" x 12" file
12" x 18" image - make 13" x 19" file
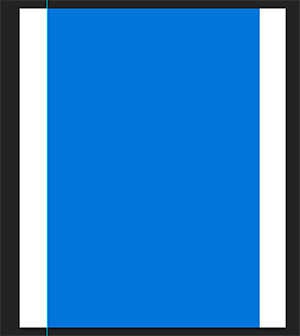
Next, drag your image onto the blank and center it so that there are two white stripes on either side of your image.
STEP 4
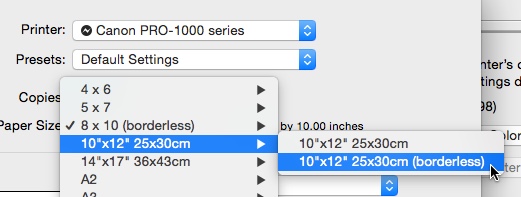
Begin the print process. Click on Print Settings.
MAC Example
8" x 12" image - choose 10" x 12" (borderless)
12" x 18" image - choose 13" x 19" (borderless)
WINDOWS Example
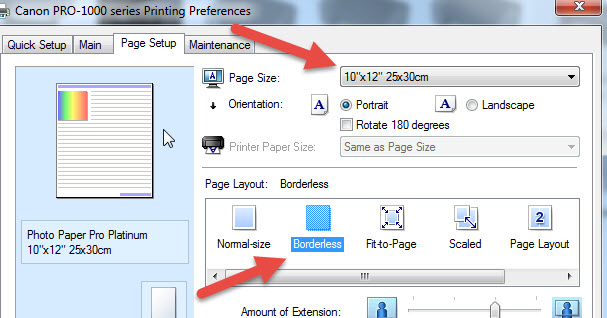
8" x 12" image - choose 10" x 12"
12" x 18" image - choose A3+ 13" x 19"
Select the Borderless option in the Page Layout submenu.
STEP 5
Finish up in the driver menus by choosing media type, print quality, and color management settings for your print.
The media type MUST MATCH the setting you edited on the printer's control panel for this to work.
Click Save (Mac) or OK (Windows) and return to the Photoshop print dialog.
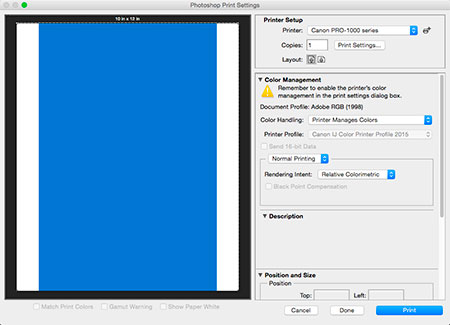
The image should look like this - white space on two sides, borderless on the other two sides.
PROVIDED you set up everything as above, the printer will accept the paper, fed through the auto-loader, and give you a borderless 8x12.
Possible Issues
You may see a thin white border on the print's trailing edge. If this occurs trimming the edge with a paper trimmer is the quickest solution. If the margin is larger than a thin sliver, verify all settings and make another print.
CANON PRO-1000 Resources
Inkjet papers for the Canon PRO-1000
Printer color profiles for the Canon PRO-1000
Last updated: June 06, 2019


