
First, let's have a quick talk about Affinity Photo. If you are learning photo editing from scratch, it is a great choice. However, if you are like us and have been steeped in Photoshop for 20+ years, Affinity's tools, processes, and requirements may be slightly disorienting. You will see below some steps that are different from Photoshop in meaningful ways.
If you are moving from Photoshop to Affinity, READ THESE DIRECTIONS at least one time thoroughly before starting work on a card.
Get Started
Open the image you want for the outside
front of your card. For this tutorial, you will need to choose an image in the horizontal (landscape) orientation.
In Affinity, go to File > Open to begin.
Step 1 - Image Size Rules
Refer to the table below for the maximum size you can make your image by card size. Make your photos this size or smaller using the crop tool or image resize feature.
This table shows you the MAXIMUM IMAGE SIZE you can use for each Red River Paper card size. Do not attempt to make your images larger than the below size.
| Card Size | Max Image Width | Max Image Height |
|---|---|---|
| 7 x 10 (A7) | 6.75" | 4.75" |
| 6.25 x 9 (A6) | 6" | 4.25" |
| 5.5 x 8.5 (A2) | 5.25" | 4" |
| 5.25 x 5.25 (Square) | 5" | 5" |
| 8 x 9 Pano | 8.75" | 3.75" |
Step 1B - Crop Your Image
We recommend the CROP TOOL because it gives you precise control over the width and height of your card image. Yes, you will likely lose a part of your original image in the process.
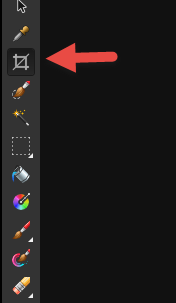
To activate the Crop Tool, click on the crop icon in the tool pallet on the left side of your screen or press the "C" key on your keyboard.
The Crop Tool control bar appears at the top of your screen:

1 - Set mode to RESAMPLE.
2 - Set units to INCHES.
3 - Set DPI to 300. For printing, set no lower than 240.
4 - Set your crop width x height.
Size and move the crop tool to your preferred portion of the image.
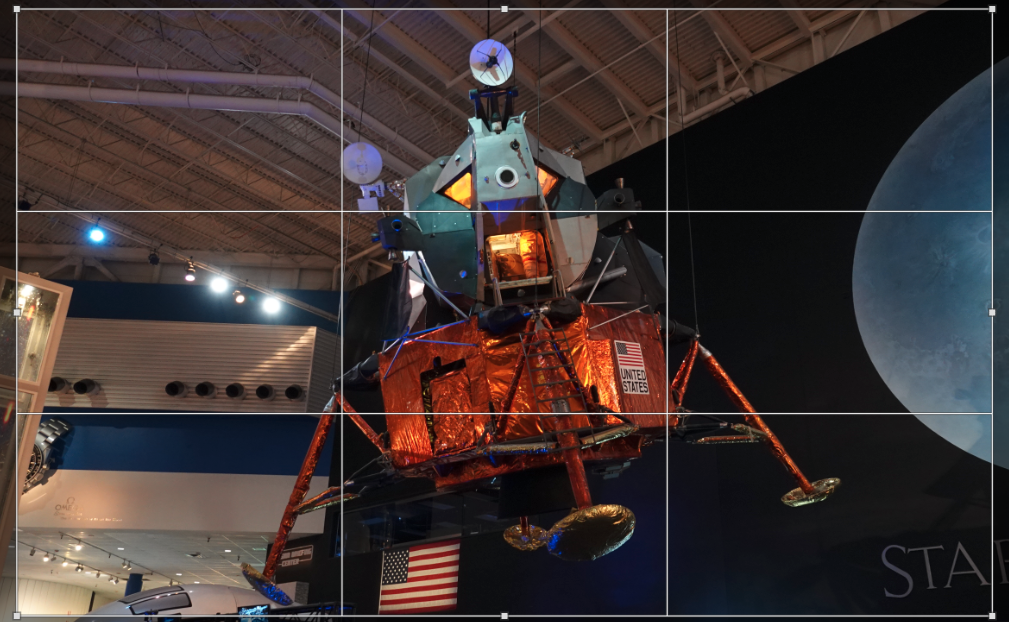
Click Apply in the Crop toolbar. The image will update to show the cropped area only.
Affinity works by showing you the area inside the crop and hiding the data cropped out. The data is still in the file. To discard the data:
Go to the Layers menu:
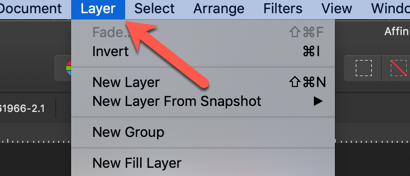
Select Rasterize & Trim
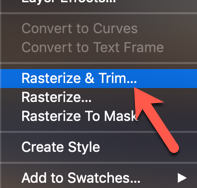
This removes the hidden data and lets us proceed.
Watch an Affinity tutorial on the crop tool here.
STEP 2 - Create Card Layout
You will now create the card layout using the Resize Canvas tool.
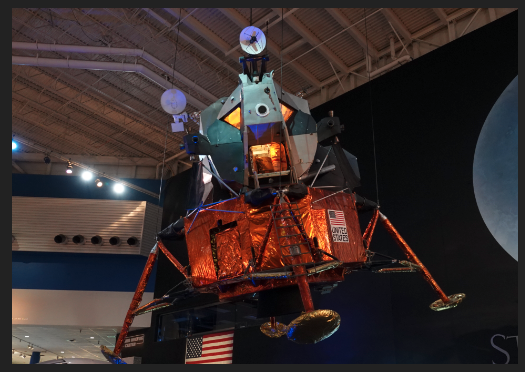
The image below has been cropped, rasterized, and trimmed.
STEP 2a - Front Panel
Go to the Document menu.
Click Transparent Background off. It will be defaulted as on.
Choose Resize Canvas.

The Resize Canvas dialog will appear, showing the current image size as the canvas size.
You will set the canvas size based on this table:
| Card Size | Set Width To | Set Height To |
|---|---|---|
| 7 x 10 (A7) | 7" | 5" |
| 6.25 x 9 (A6) | 6.25" | 4.5" |
| 5.5 x 8.5 (A2) | 5.5" | 4.25" |
| 5.25 x 5.25 (Square) | 5.25" | 5.25" |
| 8 x 9 Pano | 9" | 4" |
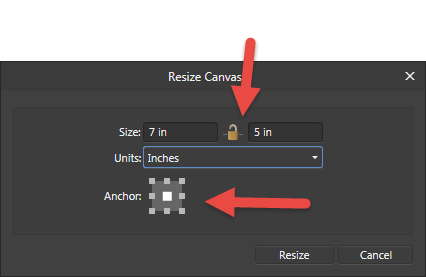
1 - Click the lock icon to UNLOCK the width and height
2 - Verify units are in inches
3 - Set width and height according to the table above
3 - Click the MIDDLE SQUARE on the Anchor as shown above
Click Resize. You will notice the image now has a white border on all four sides.
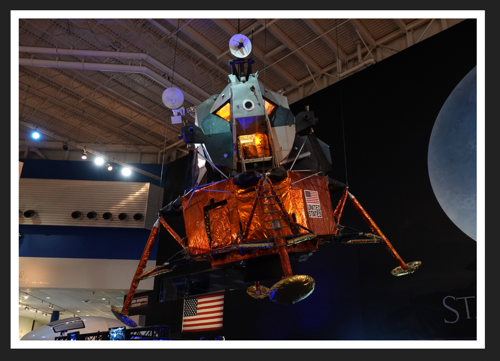
What just happened? You added space around the existing image to expand the total canvas size.
STEP 2b - Complete Card Layout
Go to the Document menu. Choose Resize Canvas.
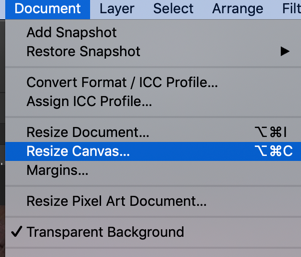
Set the canvas size based on this table:
| Card Size | Set Width To | Set Height To |
|---|---|---|
| 7 x 10 (A7) | 7" | 10" |
| 6.25 x 9 (A6) | 6.25" | 9" |
| 5.5 x 8.5 (A2) | 5.5" | 8.5" |
| 5.25 x 5.25 (Square) | 5.25" | 10.5" |
| 8 x 9 Pano | 9" | 8" |
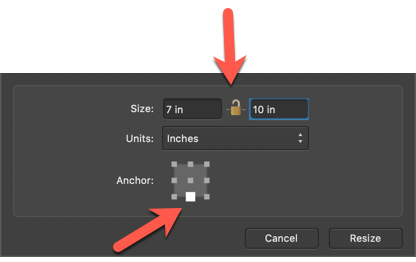
1 - Click the lock icon to UNLOCK the width and height
2 - Verify units are in inches
3 - Set width and height according to the table above
3 - Click the BOTTOM MIDDLE SQUARE on the Anchor as shown above
Click Resize. The canvas now expands, and you have a finished card layout.
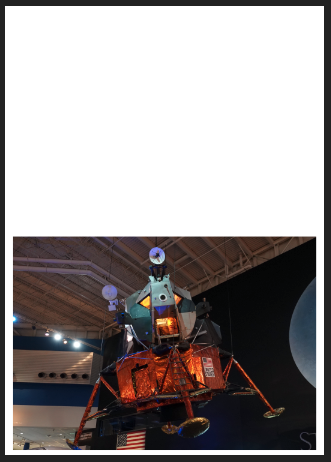
The top white section is the outside back of the card.
The image will become the outside front of the card.
NEXT - Text Tool
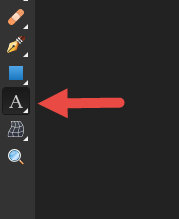
You take this opportunity to add text with the Text Tool. Click the "A" icon on the tool pallet, as shown below. Or you can press "T" on your keyboard.
The text toolbar appears at the top of the screen. It contains numerous controls and works just like text tools do in Photoshop, Photoshop Elements, and many other editing products.

When you begin typing, text appears on the screen and will be a new layer. The example below shows a line of text. Note that the text tool is active; hence the blue resize markers around the words.
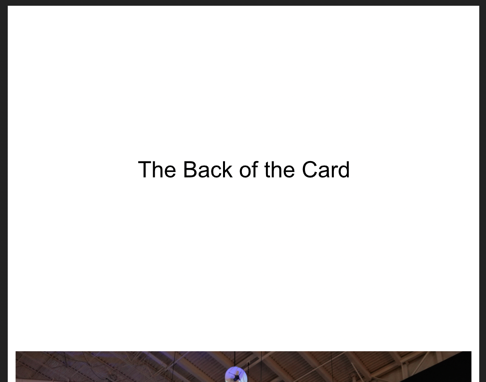
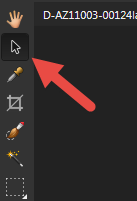
If you select the Move tool, see below, you can now click and drag the text around the layout. Remember to stay at least 1/4" from the edges.
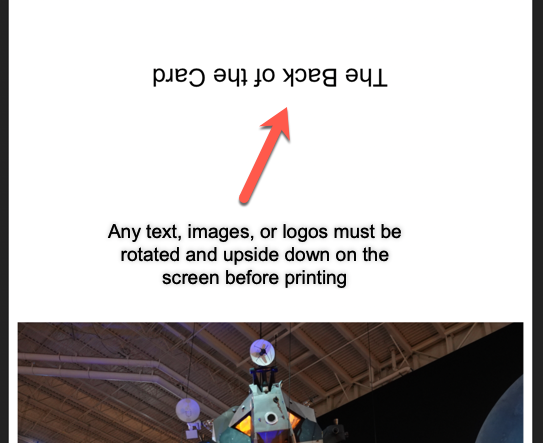
 For text and other images to print properly on this layout, items on the back panel of the card must be turned upside down.
To rotate layers (text, images, graphics), start by highlighting the layer using the move tool - click it once.
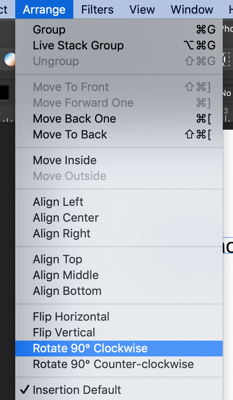
Go to the Arrange menu as shown below then click Rotate 90 Clockwise. Do this TWICE to make the layer upside down.
Below is the completed card - image on the front, text on the back.
Next Step - Printing
To print on RRP greeting cards, you will need to define a custom paper size. Since the Apple OS controls paper sizes, the process is the same for Epson, Canon, and HP printers. You have define each size one time and save them for future use.
Click File > Print
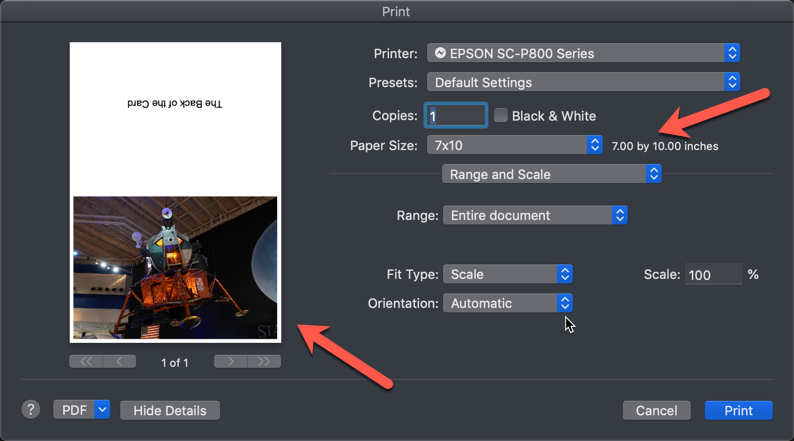
The Print dialog will appear.You will notice the preview looks incorrect. The margins are too large.
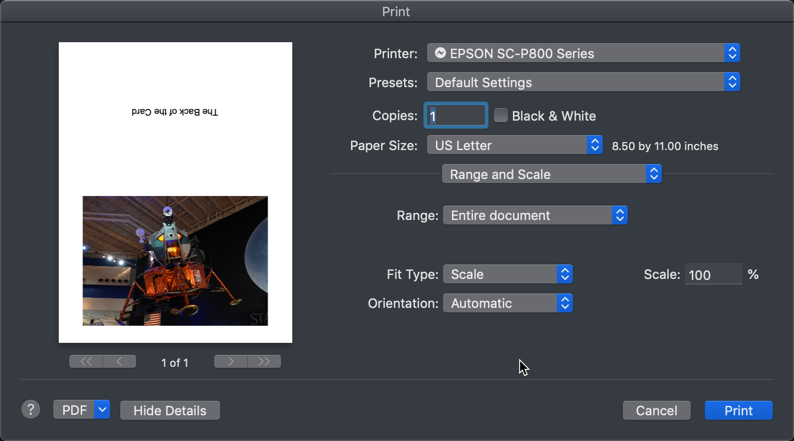
Create a custom paper size to match the size of your greeting card stock.
Click the Paper Size drop-down and choose Manage Custom Sizes.
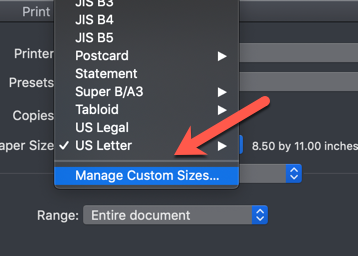
In the Manage Custom Sizes dialog:
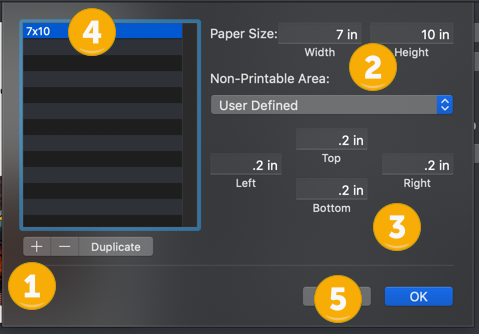
1 - Click the "+" button to create a new size
2 - Enter the width and height using the table below.
| Card Size | Set Width To | Set Height To |
|---|---|---|
| 7 x 10 (A7) | 7" | 10" |
| 6.25 x 9 (A6) | 6.25" | 9" |
| 5.5 x 8.5 (A2) | 5.5" | 8.5" |
| 5.25 x 5.25 (Square) | 5.25" | 10.5" |
| 8 x 9 Pano | 8" | 9" |
3 - Set the Non-Printable Area to 0.2" on all sides.
4 - Name the size. Double click it to rename.
5 - Click OK
When you return to the Print dialog, the new paper size will be chosen. The preview will also have changed and look correct.
Setting Your Printer
Every printer has controls for paper type, print quality, color management setup, paper feed, etc. You must set these each time you make a print.
Instructions for Epson and Canon are below
Epson
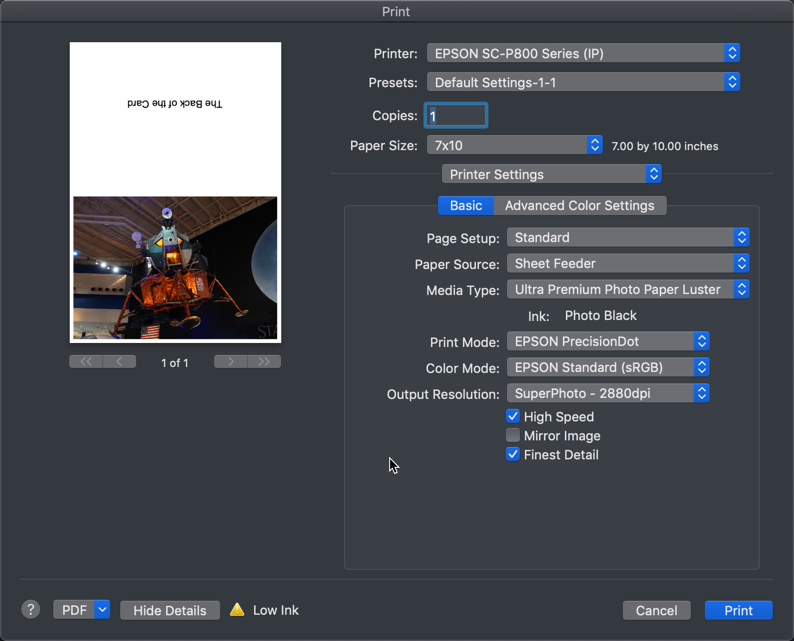
Go to the Printer Setting tab, see below.
Set the media type according to the instructions found in each Red River Paper box.
Print quality - We recommend the Photo or 1440 setting
Color Mode - Since Affinity cannot use printer color profiles, you have to let the printer manage colors.
Canon
Go to the Media Type tab, see below.
Set the media type according to the instructions found in each Red River Paper box.
Print quality - We recommend Standard
Color Controls - Since Affinity cannot use printer color profiles, you have to let the printer manage colors.
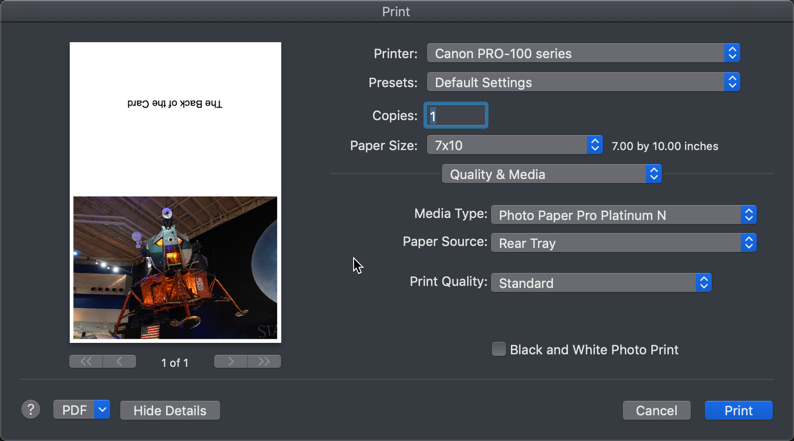
When you are satisfied with the preview and printer settings, you can click Print!
Congratulations! You have set up and printed a Red River Paper greeting card.
Trouble shooting questions? Click here
Related Posts and Information
Last updated: November 13, 2021


