Epson Print Layout is a powerful and easy to use printing application from Epson. It will work with any Epson printer model and can be downloaded from Epson's website.
If you are looking for a farily simple way to setup and print basic greeting and note cards, you might give this tutorial a try.
WHAT EPSON PRINT LAYOUT CAN DO
- Print a photo or artwork on the outside front of a greeting card
- Make layouts for all Red River Paper greeting card sizes.
WHAT EPSON PRINT LAYOUT CANNOT DO
- Print borderless cards
- Add text or other graphics to your design
- Offer more than basic design
What you see below is the extent of our support for printing cards with Epson Print Layout. Email and phone support for this app and greeting card printing is not available.What that in mind, let's get started.
Begin by opening the VERTICAL image you'd like to use. When first opened, images typically fill the existing space, defined by the Paper Size chosen in the Print Settings panel on the right.
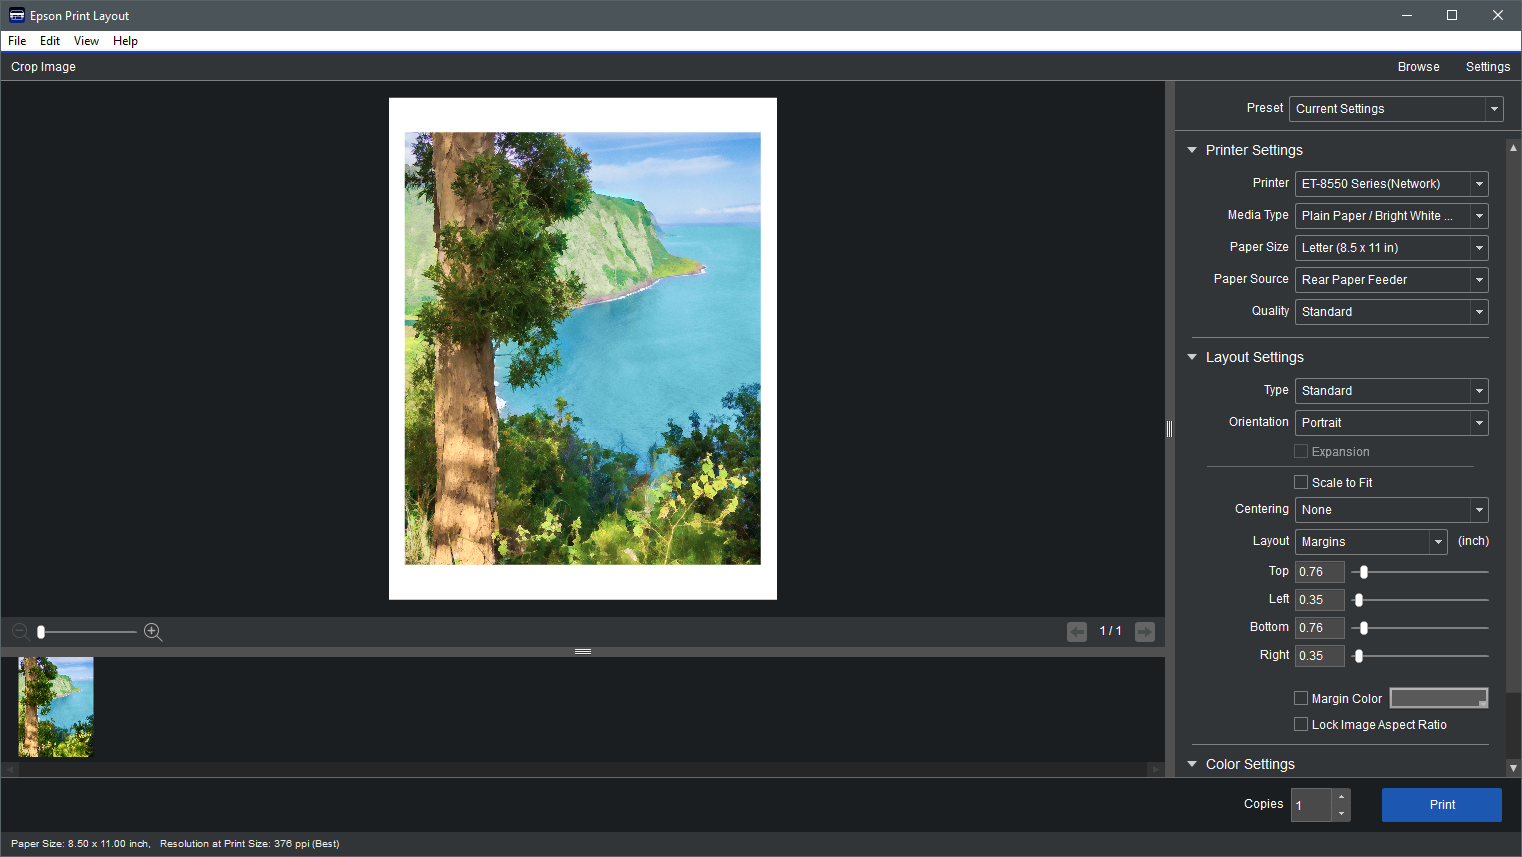
Define the Custom Paper Size
Epson printers have many sizes available in the Paper Size drop-down menu.
They will not have greeting card sizes sold by Red River Paper. So, you define the ones you would like to print on
Click on the Paper Size drop-down menu.
Look at the bottom, locate and click on Manage Custom Sizes.
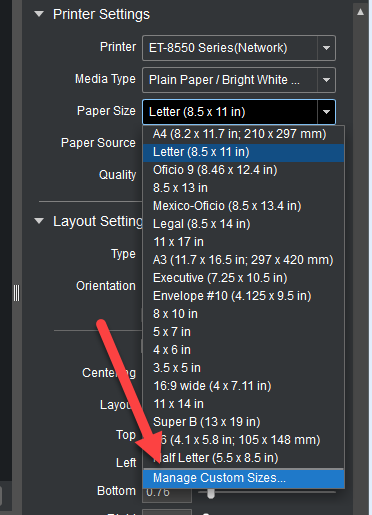
Custom Size Definition Rules
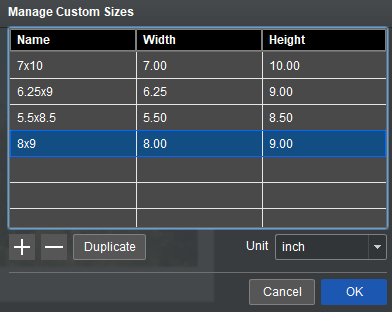
The dialog at right will appear. Defining custom sizes is easy.
Click the + button to create a new size.
Name is something you will remember.
Enter the width and then height then click OK.
The width is always the smaller dimension and the height is always the larger dimension.
Use this table as a guide:
| Card Size | Width | Height |
| 7x10 | 7 | 10 |
| 6.25x9 | 6.25 | 9 |
| 5.5x8.5 | 5.5 | 8.5 |
| 8x9 | 8 | 9 |
| Square | 5.25 | 10.5 |
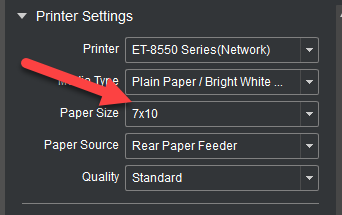
Select the Correct Custom Size
Once the Manage Custom Sizes dialog closes, you are back in Print Layout.
Click on the Paper Size drop-down and select your new custom size.
While you are looking at the Printer Settings options, set the Media Type, Paper Source, and Print Quality.
Layout Settings
1 - Verify the orientation is set to LANDSCAPE
2 - Choose Layout = Margins
3 - Define the margins of the card layout. This set is critical and will push the image into the correct location.
Set the top, bottom, & right to 0.15" - These should always be the same value
The left margin is the most important. The value depends on the size of your card. Use the table below as a guide:
| Card Size | Left Margin |
| 7x10 | 5.15" |
| 6.25x9 | 4.65" |
| 5.5x8.5 | 4.4" |
| 8x9 | 4.15" |
| Square | 5.4" |
| 8.5x11 | 5.65" |
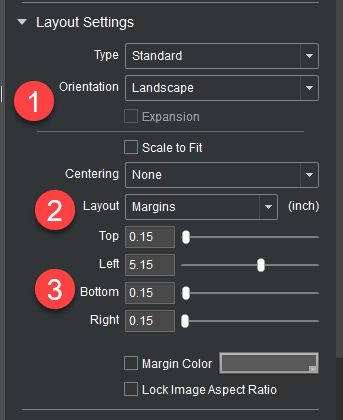
FOR ILLUSTRATION ONLY - REFER TO THE TABLE
Results
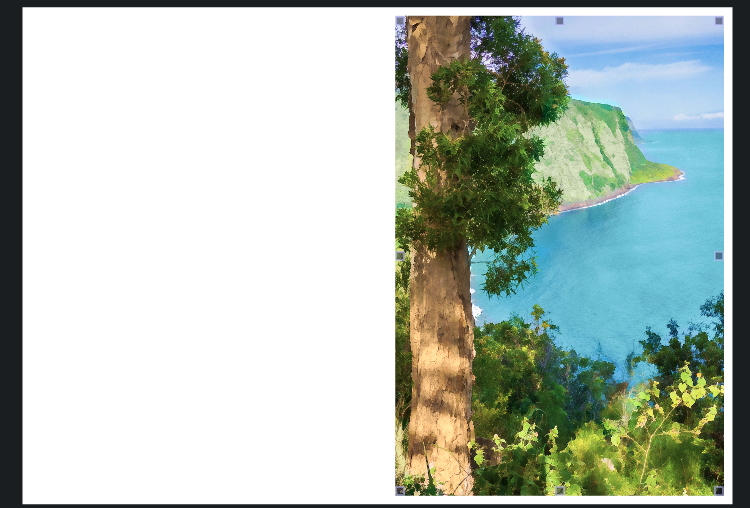
The layout will change and look like the printed unfolded card. The margins on top, right, and bottom should appear even. Though you cannot see it, the left margin should be about the same distance from the fold line as the right side is from the edge of the paper.
Load the paper vertically in your printer - the same orientation as you would 8.5x11 sheets. You can now click print.
Troubleshooting
The most likely problem will be margins being uneven. In theory they should be equal but different printers can have different unprintable margins. In addition, if your printer does not feed the card properly, margins can be slightly off.
If you encounter uneven margins, fold the card and take note of the problem. Measure the margins with a ruler.
Use the margin sliders in the Layout Settings to compensate for differences. If should only take a few tries to understand how changing the margins will affect the print.
TOP TIP - Cut copy paper to your card size and use it when troubleshooting
Related Posts and Information
Last updated: November 15, 2024


