Laurie Excell’s Tech Tuesday Photography Tips – Red River Paper
Red River Paper presents Laurie Excell’s Tech Tuesday post.
Tech Tuesday: Slow Motion Blurs
I live in the perfect location to photograph one of my favorite subjects; moving water. With all the waterfalls, rivers and streams, and the Oregon Coast nearby I am in water photography paradise!…

Not only do we have lot’s of moving water, we have plenty of overcast days (not something one usually brags about but, in this case, justified) which are perfect for providing softer light and allowing me to achieve slower shutter speeds than I would be able to if the sun were shining brightly.
Even with the overcast light, there can be challenges to reaching that perfect balance of aperture, shutter speed and ISO to render motion with just the right amount of blur to convey the desired effect that I am after. Your taste may vary!
Finding the right shutter speed/s for the movement of your subject is an important step in capturing the look and feel that you are after. The amount of light, your lens’s aperture range and your camera’s ISO settings all play a part in the shutter speeds that you can achieve in any given situation…

And there are times when you have dialed in the lowest ISO setting, the smallest Aperture and you still can’t get a slow enough shutter speed. How do you achieve extreme slow shutter speeds beyond what you camera is capable of in any light?…

Tech Specs…
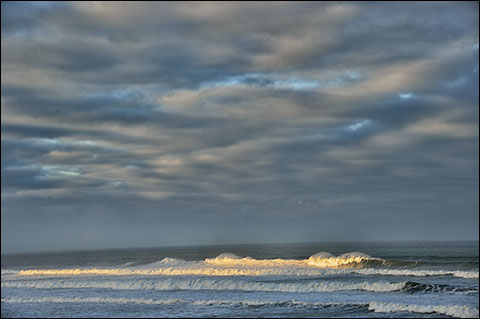
-Mid-morning, partly cloudy sky with light dancing across the waves
-Camera/Lens mounted to sturdy tripod, remote release (with interval timer) attached to camera
-Compose the scene to my liking
-Adjust critical focus using AF…then turn the AF switch to Manual!
-Fire a test shot for exposure information, review the histogram and/or Highlight Warnings on camera’s rear lcd, establish a “base” exposure
-Adjust ISO and/or aperture to find the shutter speed that provides the amount of blur desired.
-Once I have found the Aperture/Shutter Speed/ ISO combination that I like, I fire off a series of images. With motion blur I never know what interesting patters I might capture so I shoot multiples of each composition.
-If I am shooting within my camera’s shutter speed range of thirty seconds or faster, I will normally leave my camera on aperture priority. If, however, I want a shutter speed slower than thirty seconds I can go to Manual Exposure and with my remote release (MC-36) I can dial in the length of time I want the shutter to stay open into minutes or even hours.
-If there is too much light to slow my shutter speed enough to capture the blur I are looking for, I add a polarizing filter (up to 2 stop drop in shutter speed) or a neutral density filter (they come in varying sizes and densities from 1 to 10 stops).
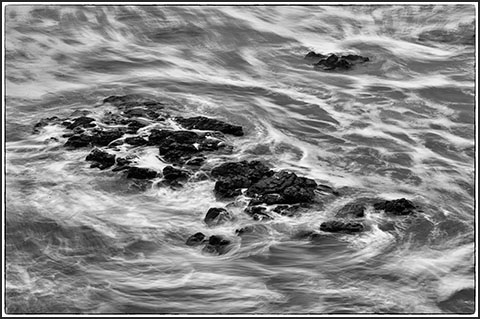
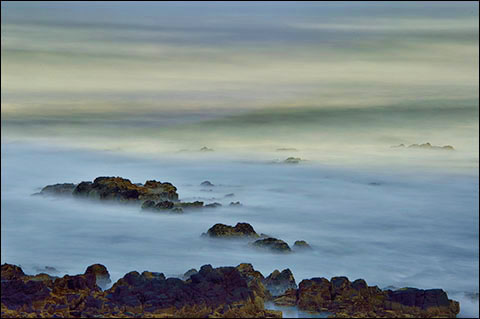
-Once I have my base exposure established I adjust the settings to a slower shutter speed setting by either adjusting the aperture, ISO or both. Example: for the above image, I did my test shot before attaching the ND400X and my reading at 100 ISO and f38 gave me 1/15 of a second which was too fast for my desired look. I made a mental note of my exposure and then attached the ND400X filter and calculated what ten stops slower would be which gave me 1 minute. I dialed the ISO to L1.0, which allowed me to shoot at a final shutter speed of 2 minutes.
-I set the camera on Manual exposure and dialed the shutter speed to the BULB setting and dialed in a 2 minute exposure on my remote release and made one final test shot. Once I confirmed that I liked the results, I dialed in interval shooting so the camera would fire over and over while I sat back and enjoyed watching the waves.
*Note: These motion blur techniques can be created with any moving subject.
Equipment:
-Nikon D4 with AF-S 28-300mm 3.5-5.6 G VR
-Nikon MC-36 Remote Release with interval timer adjustments
-Gitzo GT3531 Carbon Fiber Tripod with Really Right Stuff BH-55 ballhead
-Hoya 77mm ND 400X 10-stop Neutral Density Filter
Original Publication Date: February 19, 2013
Article Last updated: February 19, 2013
Related Posts and Information
Categories
About Photographers
Announcements
Back to Basics
Books and Videos
Cards and Calendars
Commentary
Contests
Displaying Images
Editing for Print
Events
Favorite Photo Locations
Featured Software
Free Stuff
Handy Hardware
How-To-Do-It
Imaging
Inks and Papers
Marketing Images
Monitors
Odds and Ends
Photo Gear and Services
Photo History
Photography
Printer Reviews
Printing
Printing Project Ideas
Red River Paper
Red River Paper Pro
RRP Products
Scanners and Scanning
Success on Paper
Techniques
Techniques
Tips and Tricks
Webinars
Words from the Web
Workshops and Exhibits
all
Archives
January, 2025
December, 2024
November, 2024
October, 2024
September, 2024
August, 2024
July, 2024
June, 2024
May, 2024
more archive dates
archive article list


