Shooting The Stars, Part 1: The Night Sky
by Ron Risman–
Ever since I can remember I have had a fascination with the night sky. As a young child I would stare up at the stars while on summer vacation and when my daughter was old enough I would take her out during meteor showers to see how many shooting stars we could count.
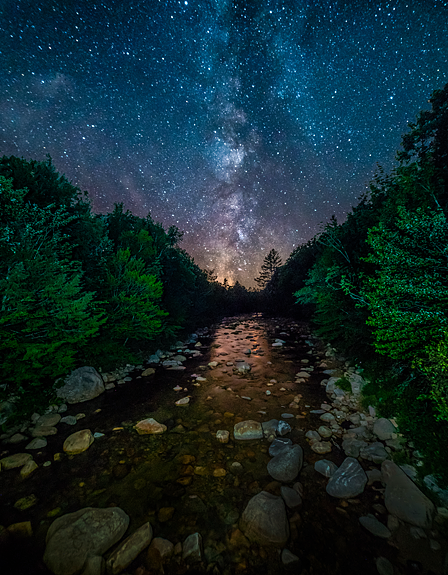
Earth and Sky. Upper Mad River, Thornton, NH. © Ron Risman
For me, night sky photography is what photography is all about – that is the ability to capture something in a way that most have never seen with their own eyes. It makes the photographs more compelling and exciting. While many astro- photographers focus on the night sky using telescopes and telephoto lenses with trackers, I gravitate more toward landscape astrophotography, using our landscapes here on earth as the foreground to the night sky. I feel that it helps to show context of location, along with the quality of the sky at that location. I try to use interesting foreground that will help to balance or compliment the sky above. Foregrounds can be anything interesting such as farm land, light houses, mountains, red rock spires or arches, lakes, rivers, tractors, trains, and more.
What’s great about night sky photography is that you likely already have the gear you need to start capturing the sky. This 3-part article will help you learn what you’ll need to know in order to make some great photographs.
Starting Out: Equipment
Here is a quick summary of the recommended gear followed by an explanation of why I recommend them. With nothing more than a digital SLR or Mirrorless camera, a wide-angle lens, and a solid tripod you can begin to capture the night sky.
- A Digital SLR or Mirrorless Camera System
- A 24mm (or wider) lens for a full-frame camera or its equivalent depending on the size of your camera sensor, with a maximum aperture of F/2.8 or faster
- A sturdy Aluminum or Carbon Fiber Tripod
- An optional Wired or Wireless Timer Remote– or you can also use the camera’s built-in self timer.
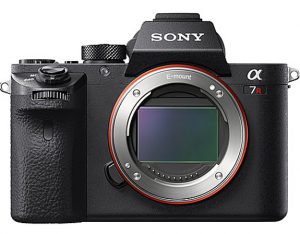
Sony A7R II Mirrorless Full Frame Camera.
A Digital SLR or Mirrorless Camera System
While there are a few point and shoot cameras (cameras with built-in lenses) that have the ability to capture night-sky images, you’ll be better served with a DSLR or Mirrorless camera since they offer larger sensors with larger pixels. Larger pixels help reduce noise at higher ISO settings and larger camera bodies help to dissipate heat generated by the sensor during long exposures which can produce white or colored “hot” pixels in the image.
A Wide Angle Lens
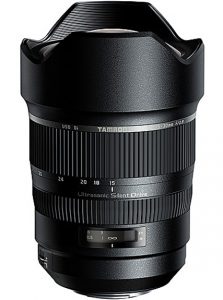
Tamron 15-30mm F/2.8 Di VC Lens
A wide angle lens is important for two reasons. It allows the camera to capture a wider expanse of the sky, and the wider field-of-view (FOV) helps to reduce motion blur caused by the movement of the stars during the exposure time which may be as long as 20 or 30 seconds (more on that later).
A good wide angle lens should have a focal length (or equivalent) of 24mm or wider. If your camera features a FULL FRAME sensor (meaning it’s the same size as 35mm film) then a 24mm lens provides a true 24mm focal length.
However, if your camera uses a smaller sensor such as APS-C or Micro Four-Thirds, you’ll need to look for a lens that offers an even wider focal length. For example, a 10mm lens on a Canon Rebel would provide a 16mm focal length equivalent, while the same lens on a Micro Four-Thirds camera would be equivalent to a 20mm lens.
An F/2.8 or Larger Aperture Lens

An F/2.8 or larger aperture lens will yield the best results.
A lens with a large maximum aperture (such as f/2.8) will allow more light through than a lens with a smaller maximum aperture (such as F/4.0). Since the stars are a very dim light source we need to make the camera as light sensitive as possible in order to get the best results.
There are three ways to help the camera “see” more light: 1. Using a lens with a wider lens aperture, 2. Using a higher ISO setting in the camera, and 3. Setting the camera for a longer exposure time. Each of these factors is equally important. For astrophotography I recommend wide-angle lenses with F/2.8 or faster (F/2.0, F/1.8 or F/1.4) maximum apertures.
Tripods
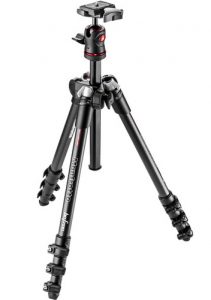
Manfrotto BeFree Carbon Fiber Tripod
You do not have to spend a lot of money; somewhere in the $70-$200 range will get you a tripod that should work very well. I recommend using tripods that feature a ball head instead of a video head.
Ball heads make it easy to level your camera without having to adjust the length of the individual legs of the tripod. A video head will work, you’ll just have to play around with leg lengths to level your camera.
Stay away from cheap tripods that have a crank to raise or lower the center column. Get yourself a solid Aluminum or Carbon Fiber tripod that has decent height without having to raise the center column.
You never want to shoot night sky photos with the center column raised, as it will vibrate your camera during the exposure from any movement around it such as people walking, cars, wind, and so on.
Wired or Wireless Remote (Trigger)
A wireless trigger provides a way to trigger your camera without having to physically touch it. Touching the camera during a longer exposure can cause the camera to vibrate for a few seconds before settling down. This can cause blur in your images. Also some cameras cannot shoot long exposures and many remote triggers and intervalometers (discussed later) will allow the shutter to stay open for specified amounts of time.
Finding a Dark Sky Location
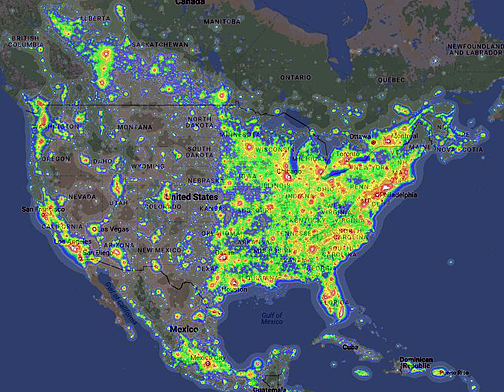
U.S. Map from Dark Site Finder (see Resources section for link).
If you live near a major city you’re not going to have any success capturing the night sky; the light pollution will wash out any attempt. Remember the high ISO and long shutter speeds of 20-30 seconds you’ll be using? These settings are designed to flood the camera sensor with as much light as possible– from the sky itself. Any ambient light from the ground will throw way too much light onto the sensor, thus washing out your attempts.
I teach night-sky workshops in Moab, Utah, because of the very dark skies. But you don’t need to travel to southern Utah to capture spectacular night sky photographs. Just drive 60–90 minutes away from the brightest, largest towns in your area making sure you don’t go in a direction that gets you close to another bright town.
The darker the sky, the more stars you’ll see, but you don’t need total darkness to still have a decent viewing and shooting experience.
I use the website Dark Site Finder (see RESOURCES for Link) to find locations that will give me the best results. When looking at the map, find the closest location to you that is overlaid with the colors Yellow, Green, Blue, or Dark Gray. Dark Gray and Blue areas have the darkest skies, but you can still get some nice shots in areas that are highlighted in Green or even Yellow.
You Don’t Have to Wait for a New Moon
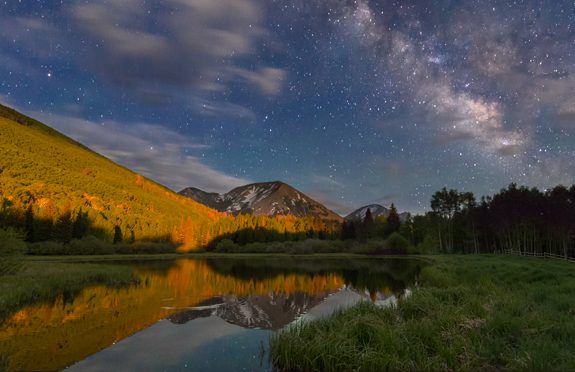
Light on the mountain provided by a setting crescent moon in the western sky. © Ron Risman
As important as it is to get away from city lights, it is also important to shoot when there’s little or no moon light. Most photographers wait for the new moon, a time when the moon is not reflecting any light back from the Sun. Officially, a new moon occurs on a particular day of the month and the day changes each month.
In reality, you can find moonless skies for almost 11 days a month if you plan well. For example, in March 2017, the New Moon falls on the 27th of the month, yet if you head out to shoot on March 20th you’ll find that the moon doesn’t rise until 12:48 am on the 21st of March, so essentially you have a moonless sky for about 5 ½ hours.
On March 31st the crescent moon only has 12.94% illumination, which can help to illuminate your foreground, but if you want no moonlight, just wait for it to set at 10:33 pm and you’ll have until 3:52 am to capture the night sky in all its glory.
Astronomical Dusk and Dawn
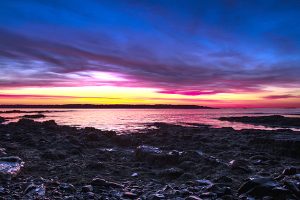
Dawn on the seacoast of New Hampshire. © Ron Risman
Astronomical dawn is when the sky starts to brighten in the early morning. In about 30 minutes it turns into nautical dawn and then 30 minutes later– sunrise. Just because the sun sets at 4:52 pm doesn’t mean you can start shooting the night sky. You’ll want to wait until the center of the sun is between 12 and 18 degrees below the horizon. This is known as astronomical dusk (or dawn), and it is at this point when the sky glow from the setting sun has all but disappeared.
Where’s the Milky Way?
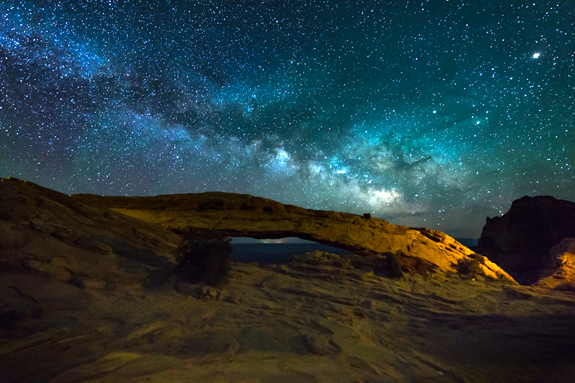
Milky Way Rises after sunset in the Spring and Summer. © Ron Risman
It is estimated that the Milky Way contains at least 100 billion stars and 100 billion planets making it a great target for astro- photography. Before I started photographing the night sky I assumed that if you looked up while under a really dark sky you’d always be able to see the Milky Way. I did not realize that it could only be viewed at certain times.
In the Northern Hemisphere the galactic center of the Milky Way (the area with the tightest cluster of stars) is only viewable from around late winter through fall. In early winter all we’re left with is its weaker section.
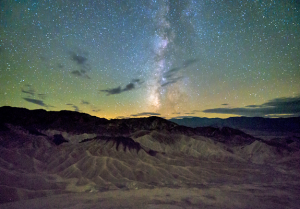
The Milky Way visible in the Southwest in the Fall. © Ron Risman
In late winter and early spring the galactic center of the Milky Way rises in the east- southeast and slowly moves toward the south as it rises. In the fall, the galactic center of the Milky Way has already risen before sunset, so you’ll want to aim toward the south-southwest to capture it.
There are plenty of mobile apps that will let you know where and when the Milky Way will rise just by entering a date and location. The apps I use are PhotoPills, Sky Guide, and Star Walk. If you prefer to use your desktop or laptop computer then check out a free web app called The Photographer’s Ephemeris or Stellarium (see RESOURCES for link).
In Part 2, we’ll discuss shooting techniques and, in Part 3, post production and a special feature on how to shoot star trails. Be sure to join me as we cover everything you need to know to make your star shots really shine.
RESOURCES
Light Pollution Map: Dark Site Finder
Milky Way Data for Desktop Computers: The Photographer’s Ephemeris and Stellarium
About Ron Risman
Ron Risman is an award-winning cinematographer and founder of Timelapse Workshops. His client list includes Land Rover, Liberty Mutual, Restoration Hardware, itteQ! Japan, Scorpion Helmets, Revit! Sports International, Berklee College of Music, FOX CT News, and WFTV-9 Orlando. Ron’s work can also be seen in the Emmy award winning film “National Parks Symphony – The Mighty Five”, and in the HBO Documentary “The Crash Reel.”
Ron’s upcoming workshops include a 3-day advanced “night-sky” timelapse workshop in Moab, Utah from May 22-26, 2017 and a 4-day motion control timelapse workshop from May 26-31 2017. You can get more information about his workshops at: TimelapseWorkshops.com
Contact Ron at: Facebook: http://www.Facebook.com/risman
To see more of his work visit these sites: Instagram: http://www.instagram.com/timeographer
Vimeo: Vimeo.com/Risman
Portfolio Site: RonRisman.com
500px: https://500px.com/timeographer
Original Publication Date: February 13, 2017
Article Last updated: February 13, 2017
Related Posts and Information
Categories
About Photographers
Announcements
Back to Basics
Books and Videos
Cards and Calendars
Commentary
Contests
Displaying Images
Editing for Print
Events
Favorite Photo Locations
Featured Software
Free Stuff
Handy Hardware
How-To-Do-It
Imaging
Inks and Papers
Marketing Images
Monitors
Odds and Ends
Photo Gear and Services
Photo History
Photography
Printer Reviews
Printing
Printing Project Ideas
Red River Paper
Red River Paper Pro
RRP Products
Scanners and Scanning
Success on Paper
Techniques
Techniques
Tips and Tricks
Webinars
Words from the Web
Workshops and Exhibits
all
Archives
December, 2024
November, 2024
October, 2024
September, 2024
August, 2024
July, 2024
June, 2024
May, 2024
April, 2024
more archive dates
archive article list


