Favorite Photo Locations: Arches National Park
By Ron Wolfe–
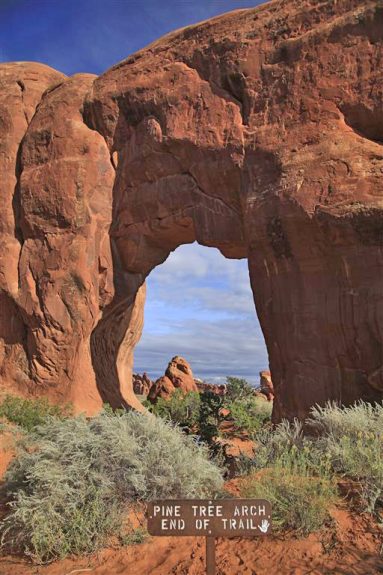
Photo © Ron Wolfe
While the 1,450-mile-long Colorado River is best known for winding through the Grand Canyon, it also offers exciting opportunities for photographers as it meanders through Southeastern Utah.
Near the town of Moab, one will find Arches National Park, Canyonlands National Park, Natural Bridges National Monument and Hovenweep National Monument– just a few of the more significant locales. Also, not to be overlooked, Monument Valley Navajo Tribal Park is further south near the Arizona border.
Arches is 236 miles southeast of Salt Lake City, 360 miles southwest of Denver and about four miles north of Moab and contains more than 2,000 natural 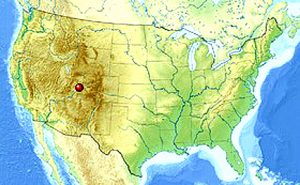 sandstone arches. It was originally declared a National Monument in 1929 by presidential proclamation and became a National Park in 1971 by an act of Congress.
Three popular sites within Arches National Monument are the Windows Section, the Delicate Arch area and the Devils Garden. 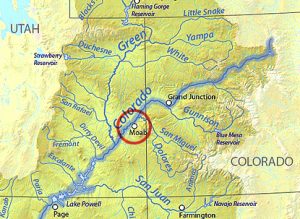 There are many other arch formations within the Park that you can explore and they are quite accessible and will provide you with plenty of photographic material.
The primary arches in the Windows Section area are first viewed when approaching in your vehicle: The Double Arches (on the left) and North and South Window (on your right) are clearly visible.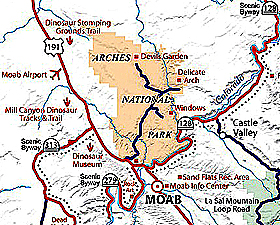 The arches in this section can be reached with relatively short walks if you’re in good physical condition. If not, be aware that there are uphill slopes, which are moderately difficult. Take water and allow time to stop and catch your breath.
Double Arch
The Double Arch is actually two arches nature combined into one. The walk to the Double Arch is relatively easy, mostly over nearly flat ground. There may be many people climbing or mingling around the base of the arch and on nearby rock structures making it nearly impossible to get a photograph of this arch free of crowds during the day. At night, though, few people take the short hike to the arch, so night shots with stars or of the arch painted with light can make dramatic shots.
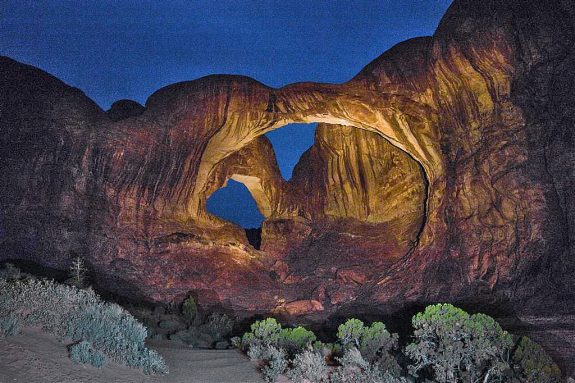
Double Arch light painting. Photo © Ron Wolfe
North Window and South Window Arches
These arches sit side-by-side on the opposite side of the parking lot from the Double Arch and are more difficult to reach. The North Window is easily visible from the parking lot and the South Window more-so when hiking up to them. Access to these arches is up a gradual slope of several hundred yards. If you’re not in good physical condition take care and stop frequently on the uphill grade. The North Window is normally seen first, and one needs to take the trail junction to the right to view the South Window. There may be crowds around the base of the arches, especially at the North Window, so clean shots of them may be difficult to obtain.
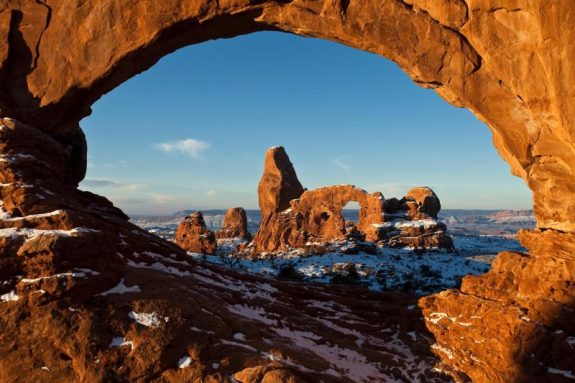
Turret Arch framed by North Window arch. NPS photo
Turret Arch
The Turret Arch is on the same side of the parking lot as the Window Arches. Once at the North Window, you can walk south past the South Window and follow the trail to the Turret Arch. From the Windows Arches, the trail is relatively easy to navigate for all. There is another trail that leads from the Turret Arch downhill to the parking lot.
The Delicate Arch
The Delicate Arch appears on Utah license plates and is the park’s prime attraction. It is located near Wolfe Ranch, the site of several petroglyphs– carvings on rock made by prehistoric artists. You can hike to the Delicate Arch from the Wolfe Ranch parking area, however parking is limited. You may need to time your arrival to get a space.
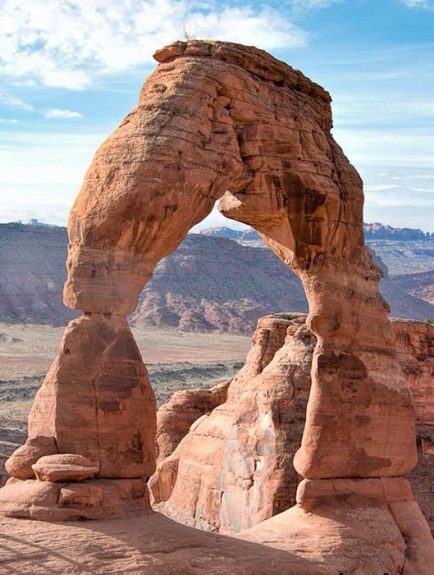
Delicate Arch. Photo © Joe Polichio
The hike is up a gradual slope about 1.3 miles to photograph Delicate Arch close-up or you can continue down the road to the Delicate Arch Viewpoint to see the arch at a distance. The hike to the arch is up a persistent slope and is more difficult than it appears. You should consider your physical condition before attempting this journey, especially when carrying a tripod, camera equipment, water and other supplies.
Photos taken closer to the arch can be more dramatic than from the Viewpoint especially if shot late afternoon to sunset. This will mean returning to your car in darkening conditions. During daytime, photographs will probably have a lot of people in them. If you consider an evening or night shoot, be sure to bring good lighting. The trail can be treacherous.
If you chose to view or photograph this arch from the Viewpoint, park your vehicle and walk to it. On this hike, there is an upward slope from the parking lot and a much steeper slope as you approach the Viewpoint. Once there, you will be about a mile from the arch. Use a telephoto lens along with a tripod or monopod to stabilize your camera. If you don’t have either of these, simply lean on a rock or tree to steady your shot.
The Devils Garden
Once you arrive at the Devils Garden area and park your vehicle, seeing the arches will require hiking on hilly trails. The trails are not too steep, but there are rises and falls, which may require you to catch your breath. The hike is worth the effort, though, in terms of the arches available to photograph along the way and on side trails. Don’t miss Landscape Arch, Pine Tree Arch and others that will yield great images.
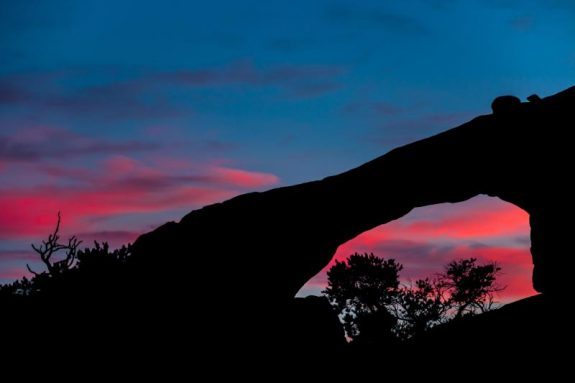
Twilight and nighttime can yield some dramatic photos. Be sure to dress warmly and take along a good flashlight with extra batteries. NPS photo
Landscape Arch is reached by a trail that takes you into a sandy arroyo as you approach it. You will find that this arch is relatively wide when you arrive at the viewing point but you will be several hundred feet from it. Many people shoot this arch using a standard zoom lens (approximately 28mm to 105mm) but you may want to try a wider or longer lens for some unique effects.
Pine Tree Arch can be located by taking the first trail junction to the right when walking to Landscape Arch. This side trail leads directly to it and is an easy hike from the main trail– mostly flat. You can walk close to this arch –actually through it if you’d like to– so the wide end of your zoom or an even wider lens may give you more dramatic images.
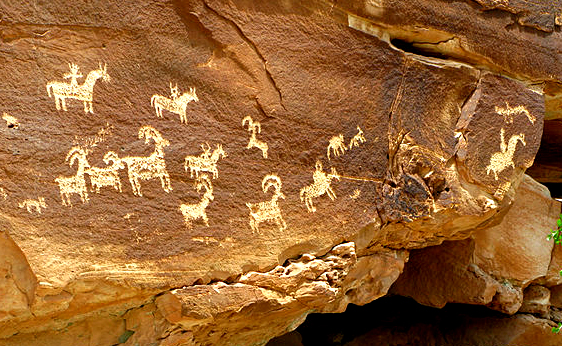
Ute tribal rock art at Arches National Park carved between A.D 1650 and 1850 showing stylized horse and rider surrounded by bighorn sheep and dog-like animals. Photo © Sanjay Acharya
Other arches abound when you retrace the Pine Tree Arch trail to the Landscape Arch trail. The next section of the trail beyond Landscape Arch may be considered strenuous but many people do continue on. From the viewing area for Landscape Arch and high up to the right, you’ll see another arch. To photograph it best from this viewing point, use a long lens.
A trip to Southeastern Utah can be very inspiring in terms of the numerous photo opportunities you will encounter. The best places to stay in the Arches area are in Moab, an upscale town with many hotels, restaurants and night life.
Since Arches does not provide any services, Moab is the place to stock up on perishable supplies for your trail hikes and also has many attractions nearby worth visiting, one of which is a dinosaur museum that has a collection of many of the remains of these huge animals that roamed the area over a hundred million years ago.
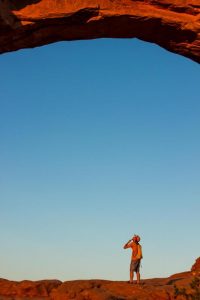
View through North Window. NPS Photo
Trip Planning:
- Plan your trip for the time of year desirable for your situation. You may wish to avoid crowds and the summer heat.
- Check for local holidays and events. Unknowingly, we selected dates during which a state holiday occurred– state public schools were in recess, resulting in crowding and entry delays.
- Check weather predictions for your trip, if possible– arriving at Arches when the weather is overcast, raining, or during other adverse weather conditions may not be perfect for photography!
- Take advantage of a Golden Age Passport, if you are a senior or are traveling with a senior. At the park entrance, you may find a large line of vehicles queued-up to gain access– even in the off-season. With an occupant having such a pass, park rangers may allow vehicles, to bypass long entry lines.
- You will not find water or food in the park– plan ahead and carry whatever you need with you.
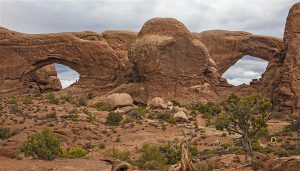
North and South Windows. Photo © Ron Wolfe
Hiking Tips:
- Pace yourself as some trails can be tiring.
- Watch out for critters such as Coyotes and snakes which are active at night. Wear sturdy boots.
- Carry lots of water (you may want to pour some over your head when hot).
- Sunscreen and sunglasses are recommended.
- Energy bars or other snacks will come in handy.
- Wear a broad-brimmed hat and sturdy shoes, preferably hiking shoes.
- Wear clothing appropriate for the season.
- Make sure flashlights have fresh batteries and spares if you plan to do night photography and/or light painting).
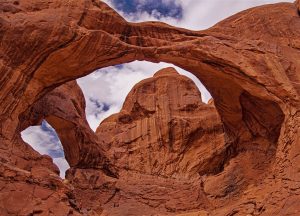
Double Arch from Viewpoint. Photo © Ron Wolfe
Photo Suggestions:
- Avoid taking heavy photo equipment on the steeper trails.
- If you have schedule flexibility, use weather conditions to determine when to visit: Clearing storms followed by clear night skies are ideal.
- Plan to get out under the stars to shoot (and consider light painting).
- Go on your own or with other like-minded photographers. Shooting photos does not always blend well with the touring plans of others!
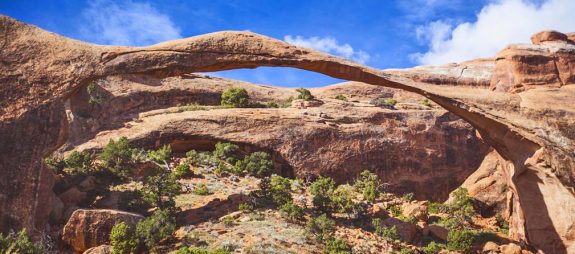
Landscape Arch. Photo © Ron Wolfe
More Information:
Arches National Park– Official Site
Detailed Map of Arches National Park
Arches National Park Photo Gallery
Original Publication Date: January 08, 2017
Article Last updated: January 08, 2017
Related Posts and Information
Categories
About Photographers
Announcements
Back to Basics
Books and Videos
Cards and Calendars
Commentary
Contests
Displaying Images
Editing for Print
Events
Favorite Photo Locations
Featured Software
Free Stuff
Handy Hardware
How-To-Do-It
Imaging
Inks and Papers
Marketing Images
Monitors
Odds and Ends
Photo Gear and Services
Photo History
Photography
Printer Reviews
Printing
Printing Project Ideas
Red River Paper
Red River Paper Pro
RRP Products
Scanners and Scanning
Success on Paper
Techniques
Techniques
Tips and Tricks
Webinars
Words from the Web
Workshops and Exhibits
all
Archives
January, 2025
December, 2024
November, 2024
October, 2024
September, 2024
August, 2024
July, 2024
June, 2024
May, 2024
more archive dates
archive article list


