Instructions for Epson, Canon, and HP inkjet printers
Color profiles are pieces of software that bypass your printer color management in an attempt to reproduce better color gamut and print quality for a specific paper, printer and ink set. If you are unfamiliar with profiles or Photoshop, read all support documents carefully before beginning.
View a Video on Profile Installation
Key Concept: In this tutorial, we are allowing Photoshop to manage the colors. Your printer color systems are being turned off.
GET STARTED
When you are ready to print, choose File > Print (Command +P) and the Print dialog will appear.
1) Verify your document is Adobe RGB, sRGB, or ProPhoto RGB
2) Set Color Handling to Photoshop Manages Colors
3) Choose your paper’s profile from the Printer Profile drop down
4) Select rendering intent – Relative Colorimetric or Perceptual. We recommend Relative Colorimetric.
5) Check Black Point Compensation
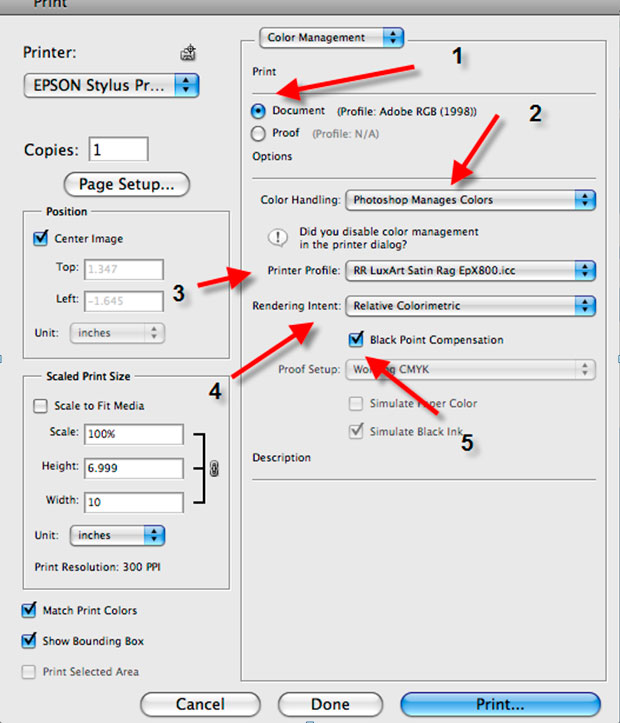
Now click PRINT.
EPSON PRINTERS (scroll down for Canon and HP)
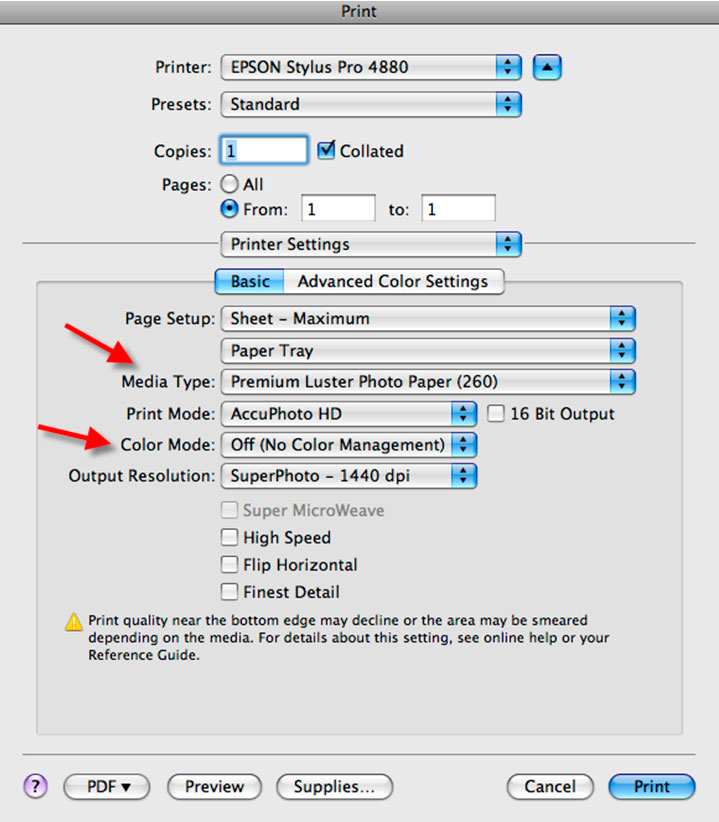
Key Concept: Set the media type based on your profile’s instructions.
Note: The name of the Red River paper you're using will not show up in this drop down menu.
Color Mode should be set to Off (No Color Management).
Verify your other quality settings and click Print.
CANON PRINTERS
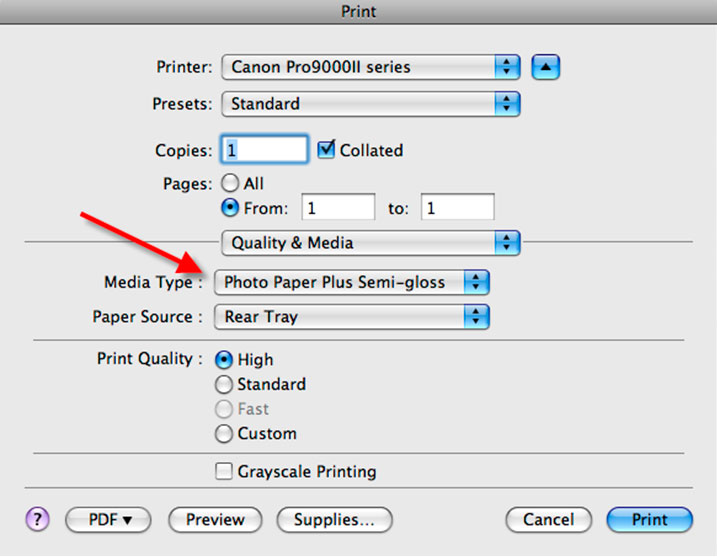
Key Concept: Set the media type based on your profile’s instructions.
Note: The name of the Red River paper you're using will not show up in this drop down menu.
Set Print Quality to your desired setting
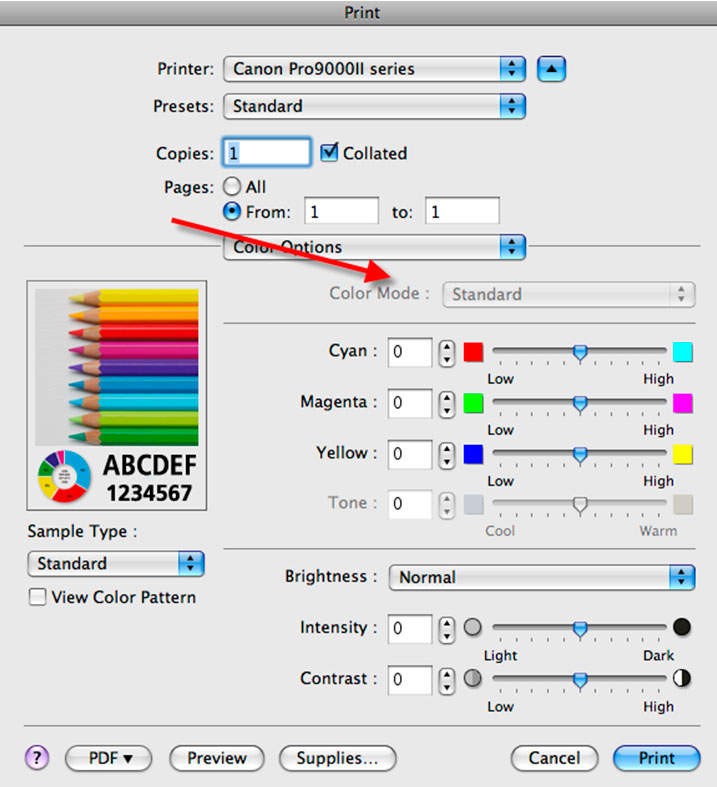
In the Color Options menu the Color Mode should be grayed out.
Click Print.
HP PRINTERS
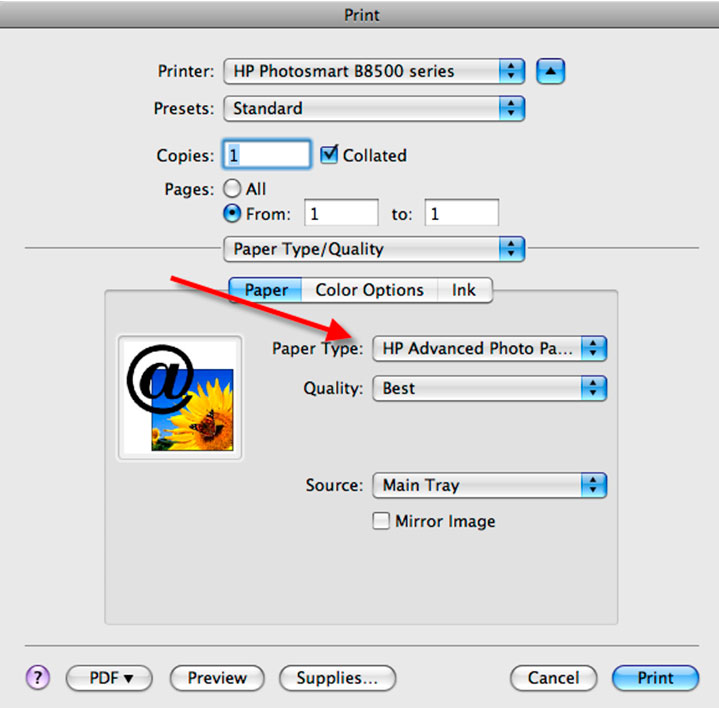
Key Concept: Set the media type based on your profile’s instructions.
Note: The name of the Red River paper you're using will not show up in this drop down menu.
Set quality to your desired setting
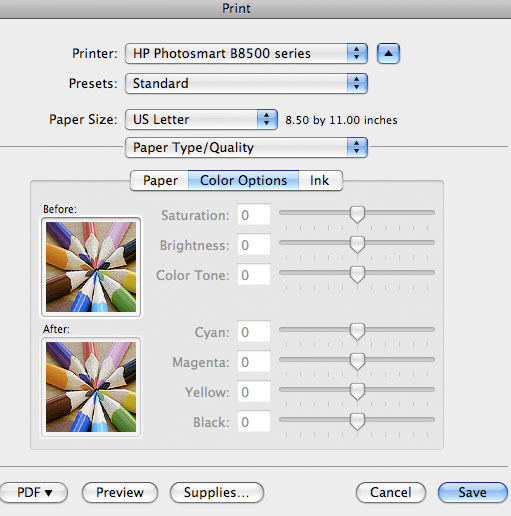
On the Color Options tab, all controls should be grayed out. This indicates that Photoshop is managing the colors.
Click Print.
Related Posts and Information
Last updated: January 13, 2020


